Easy Homemade Apple Fritters for Beginners
Making donuts at home sounds like a big job. I used to think it was only for professional bakers with giant kitchens. Then I tried making apple fritters. They are much easier than regular donuts because you do not have to wait for dough to rise. You just mix, chop, and fry. By the end of this page, you will know exactly how to make these crispy treats in your own kitchen.
These fritters are full of juicy apple chunks and sweet cinnamon. They taste just like the ones from a fancy bakery but cost much less to make. You can have a warm batch ready in less than thirty minutes. I promise it is simpler than it looks!
Get your apron ready and let’s get cooking!
Why You Will Love These Simple Fritters
Most people love donuts but hate the hard work. This recipe is the perfect middle ground. You get all the flavor of a fried treat without the yeast or the hours of waiting. It is basically a thick pancake batter filled with fruit that gets crispy in a pan. It is hard to mess up, which makes it great for your first time frying food.
I remember the first time I tried to make these. I was so worried about the oil being too hot. I actually burnt the first two! But I learned that if you keep the heat steady, the apples get soft and the outside gets a beautiful gold color. It is a very rewarding snack to share with friends or family on a Saturday morning.
The Short List of Ingredients

You do not need anything fancy for this recipe. You probably have most of these items in your pantry right now. Keeping things simple is the best way to start. For the best flavor, I suggest using firm apples that have a little bit of a sour kick. This balances out the sweet glaze we will put on top later.
- 2 large apples (Granny Smith or Honeycrisp work best)
- 1 and 1/2 cups of all-purpose flour
- 1/4 cup of granulated white sugar
- 2 teaspoons of baking powder
- 1/2 teaspoon of salt
- 1 teaspoon of ground cinnamon
- 1/3 cup of whole milk
- 2 large eggs
- 1 tablespoon of melted butter
- Vegetable oil for frying
- 1 cup of powdered sugar and 2 tablespoons of milk for the glaze
Prepping Your Apples the Right Way

The secret to a great fritter is the size of the apple bits. If you cut them too big, they will stay crunchy and hard inside the fried dough. If you cut them too small, they turn into mush and you won’t taste them. I like to aim for pieces about the size of a pea. This way, they soften up perfectly in the short time they spend in the hot oil.
Peeling the apples is also a must. I once forgot to peel them because I was in a hurry. The skin became tough and chewy after frying, and it wasn’t very fun to eat. Take the extra two minutes to peel them. Your teeth will thank you! Once they are peeled and chopped, toss them with a tiny bit of cinnamon to keep them from turning brown while you mix the rest of the batter.
Mixing the Perfect Fritter Batter

Mixing the dough is very quick. You want to whisk your dry ingredients together first so the baking powder is spread out evenly. Then, you add your wet ingredients. It is important not to over-mix this batter. If you stir it too much, the flour develops gluten, and your fritters will turn out tough like bread instead of light and tender.
The batter should be thick. It should not run off a spoon like water. If it feels too thin, add one more spoonful of flour. If it is so thick you can’t stir it, add a tiny splash of milk. IMO, a thick batter stays together better when it hits the hot oil. This keeps your fritters from falling apart into tiny pieces when you start frying them.
Recipe Quick Info
- Prep Time: 15 minutes
- Cook Time: 10 minutes
- Servings: 8 large fritters
- Difficulty: Easy
How to Fry Without the Fear

Frying can be scary if you have never done it. The key is to use a heavy pan and enough oil to cover the bottom by about an inch. You do not need a deep fryer for this! A simple skillet works great. You want the oil to reach about 350 degrees. If you don’t have a thermometer, drop a tiny bit of batter in. If it sizzles right away, you are ready to go.
- Heat your oil over medium heat.
- Drop a large spoonful of batter into the pan and flatten it slightly with the back of the spoon.
- Cook for about 2 to 3 minutes until the bottom is a deep golden brown.
- Flip it carefully and cook the other side for another 2 minutes.
- Move the cooked fritters to a plate with a paper towel to soak up extra oil.
Do not crowd the pan. If you put too many in at once, the oil temperature drops and the fritters will get greasy. Cook only two or three at a time so they stay crispy.
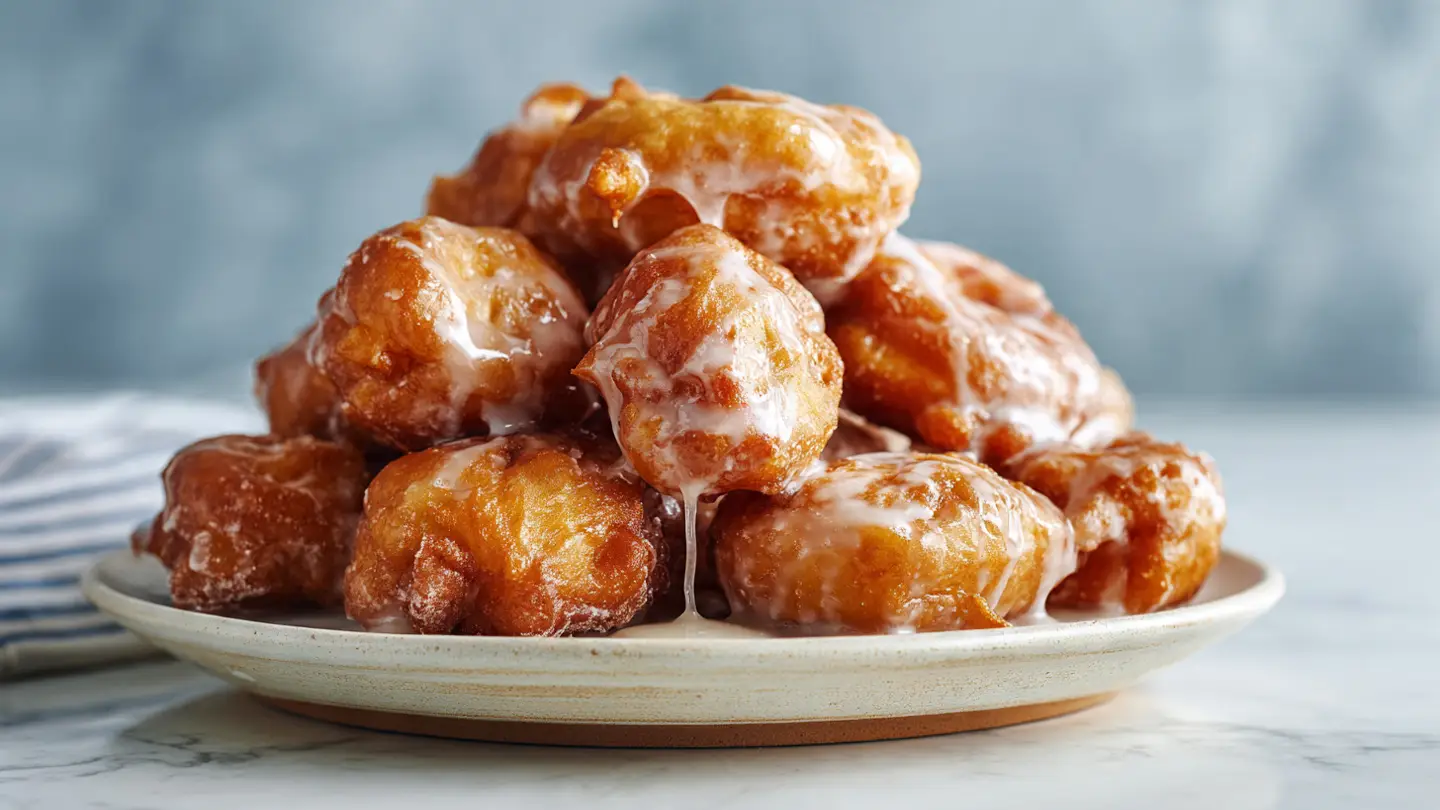
Making the Sweet Sugar Glaze

A fritter is not complete without a shiny glaze. While your fritters are cooling just a little bit, whisk together your powdered sugar and milk. You want it to be thin enough to pour but thick enough to coat the back of a spoon. If it is too thick, it won’t soak into the warm nooks and crannies of the fritter. If it is too thin, it will just disappear.
I like to add a tiny drop of vanilla to my glaze for extra flavor. Dip the fritters while they are still warm! This helps the glaze stick and create that classic bakery look. FYI, if you wait until they are completely cold, the glaze might just sit on top like a hard shell. Dipping them warm makes them melt-in-your-mouth soft.
Pro Tips for the Best Results

One practical tip most blogs skip is to use a wire rack for cooling. If you put hot fritters directly on a flat plate, the steam gets trapped underneath. This makes the bottom of your fritter soggy. A wire rack lets the air move all around the treat so it stays crunchy on every side. It is a small step that makes a huge difference in the final texture.
Also, pay attention to the oil type. Use something with a high smoke point like vegetable or canola oil. Avoid olive oil or butter for frying because they will burn and make your kitchen smoky. This might not work if your oil is too cold, as the dough will just drink up the oil and taste heavy. Always test the heat before you start the whole batch.
Beginner Success Secrets
- Don’t Rush: Let the oil come back to heat between batches.
- Drain Well: Use plenty of paper towels to keep things light.
- Apple Choice: Use Granny Smith for a tart crunch that cuts the sugar.
Serving and Storing Your Treats

Fritters are best when they are eaten right away. There is nothing like a warm donut with a cup of coffee or a glass of cold milk. However, if you have leftovers, you can keep them in an airtight container for about two days. Just keep them at room temperature. Don’t put them in the fridge, or they will get very tough and lose their shine.
To make them taste fresh again the next day, pop them in a toaster oven for a minute. This brings back some of the crunch. They are also great for a quick breakfast on the go. Just grab one and run! They might not be as healthy as a bowl of oatmeal, but they sure do make the morning more exciting. Honestly, your family will think you are a hero when they wake up to the smell of cinnamon and apples.
Common Fritter Questions
Can I use canned apple pie filling instead?
You can, but it makes the batter very wet. Fresh apples provide a much better texture and a fresh taste that isn’t too mushy.
What is the best oil for frying donuts?
Vegetable oil or Canola oil are the best choices. They have a high smoke point and a neutral flavor that won’t change the taste of your fritters.
Why are my fritters raw in the middle?
Your oil is likely too hot. The outside browns too fast before the inside can cook. Lower the heat and cook them a bit longer.
Can I bake these instead of frying them?
Baking changes the texture to more of a muffin. For the classic crispy fritter experience, frying is the way to go.
How do I keep the glaze from melting off?
Let the fritters cool for about five minutes on a rack before dipping. They should be warm, but not burning hot.
Time to Start Frying
You now have all the tools to make amazing apple fritters at home. Remember to keep your oil steady and your apple chunks small. These treats are proof that you do not need to be a pro to make something delicious. Go ahead and give it a try!