Simple and Smooth Egg Custard Pie
Egg custard pie is one of those treats that feels like a big hug from grandma. It is simple, sweet, and has a texture that just melts in your mouth. Many people feel scared to make it because they think the eggs will turn into a scramble. I am here to tell you that it is actually very easy if you follow a few basic rules. You do not need fancy tools or weird ingredients to make this happen in your own kitchen.
In this post, I will teach you how to make a pie that is perfectly smooth and never watery. We will talk about how to get that golden top and how to keep the crust nice and crisp. By the end of this, you will feel like a pro baker even if you have never cracked an egg before today. It is time to clear off your counter and get ready to bake something truly special.
Keep reading to find out my secret tricks for the best custard pie ever!
Recipe Quick Info
- Prep Time: 15 minutes
- Cook Time: 45 minutes
- Servings: 8 people
- Difficulty: Easy
Everything You Need for the Best Pie
Before you start mixing things, you need to make sure you have all your stuff ready. This is a simple pie, so the quality of what you use really matters. Since there are only a few ingredients, you can really taste each one. I like to use fresh eggs because they give the custard a better color and a much richer flavor. If you can get eggs from a local farm, that is even better, but store eggs work just fine too.
Milk is another big part of this recipe. Some people use skim milk, but I find that it makes the pie too thin. I always go for whole milk or a mix of milk and cream. This makes the filling feel like velvet on your tongue. You also want to make sure your spices are fresh. That little bit of nutmeg on top is what makes a custard pie look and smell like a classic dessert. Let us look at the full list of things you will need to grab from the store.
The Short List of Ingredients

For this recipe, you will need a few basic things that you likely already have. You need one pie crust, four large eggs, and three-quarters of a cup of white sugar. You will also need two and a half cups of whole milk. To make it taste great, grab some vanilla extract and a little bit of salt. Do not forget the ground nutmeg for the very top of the pie.
If you want to be extra fancy, you can use a vanilla bean instead of extract. I usually just stick to the liquid kind because it is easier and cheaper. Make sure your eggs are at room temperature before you start. This helps them mix into the milk without leaving any yellow streaks in your finished pie. This recipe is great for kids because there are no nuts or fruit chunks to worry about.
Why These Ingredients Work Together

The eggs are the most important part because they hold everything together. When you bake them slowly with the milk, they create a soft structure. The sugar adds sweetness but also helps the eggs stay tender. Without enough sugar, the eggs might get too firm and rubbery. I learned that the hard way when I tried to make a low-sugar version last year. It tasted like a sweet omelet, which was not very good at all!
Vanilla and salt are like the supporting actors in a movie. They do not take over, but they make the main flavor better. The salt cuts through the sugar so the pie is not too sweet. The nutmeg adds a warm smell that fills your whole house while the pie is in the oven. It is a simple team of ingredients, but they work perfectly to create a balanced dessert for any time of year.
How to Make Your Pie Step by Step
Now that you have your ingredients, it is time to get to work. Making the custard is all about being gentle. You do not want to whip a lot of air into the mixture. If you see too many bubbles on top, your pie might have a weird, holey texture. I always use a hand whisk and move it slowly. It takes a little more time, but the result is much better. You want the liquid to look like a smooth yellow river before it goes into the oven.
Another big tip is to watch your oven temperature. Custard likes low and slow heat. If the oven is too hot, the eggs will cook too fast and pull away from the crust. This is called weeping, and it leaves a pool of water at the bottom of your pie dish. No one wants a soggy pie! Follow these steps carefully to make sure your pie comes out looking like a picture in a magazine.
Preparing Your Pie Crust

- Start by preheating your oven to 400 degrees.
- Roll out your pie dough and fit it into a 9-inch pie dish.
- Trim the edges and pinch them with your fingers to make a pretty pattern.
- Prick the bottom of the crust with a fork a few times.
- Bake the crust for about 10 minutes until it is just starting to turn light brown.
I like to pre-bake my crust for a few minutes. This is called blind baking. It stops the bottom from getting soggy once you pour the liquid inside. FYI, you can use a store-bought crust to save time, and it will still taste amazing. If you do use a frozen crust, make sure to let it thaw for a bit so it does not crack when you put it in the pan. This step is the best way to get a crunchy bite every time.
Mixing the Custard Filling

In a large bowl, whisk your eggs and sugar together until they are well combined. You do not need to beat them until they are fluffy. Just make sure the yellow and white parts are all one color. Slowly pour in the milk and the vanilla extract. Add your pinch of salt now too. Keep whisking gently so you do not create a lot of foam on the top of the bowl.
If you do get a lot of bubbles, you can use a spoon to scoop them off. This makes the top of the pie look much smoother once it is baked. I once forgot to do this and the top of my pie looked like a sponge! It still tasted okay, but it was not very pretty. Taking an extra minute to be careful here really pays off when you show the pie to your friends or family.
Baking to Perfection

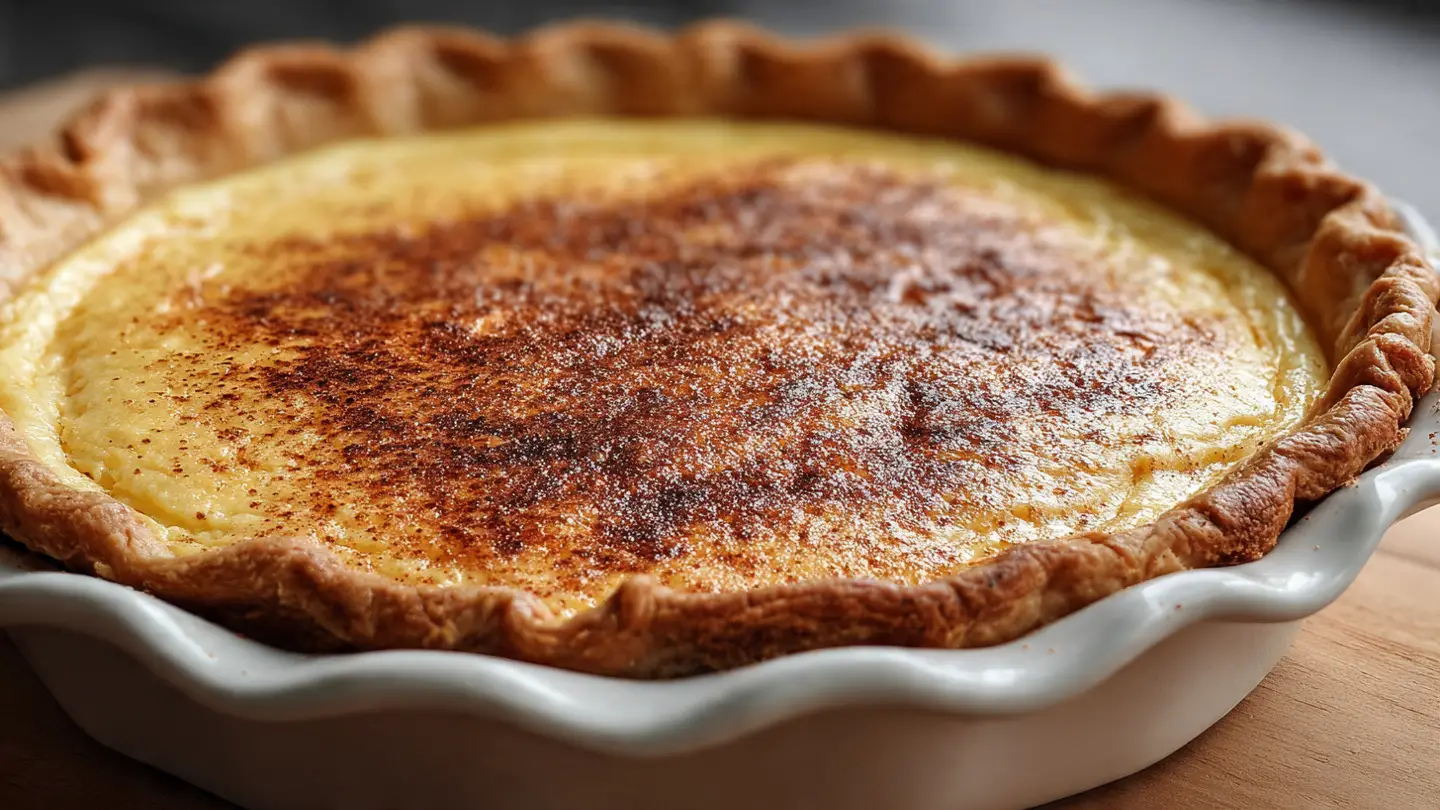
Turn your oven down to 350 degrees before you put the pie in. Carefully pour the custard mixture into your warm pie crust. I find it easiest to put the crust on the oven rack first and then pour the liquid in. This stops the milk from spilling all over your floor while you walk to the oven. Sprinkle a good amount of nutmeg over the top of the liquid.
Bake the pie for 35 minutes to 45 minutes. You will know it is done when the edges are set but the middle still jiggles a little bit when you move the pan. It should look like Jell-O in the center. Do not wait for the middle to be hard, or you will overcook it. The pie will keep cooking for a few minutes after you take it out of the oven. This is the secret to that silky texture we all love.
Tips and Tricks for the Best Results
Even though this recipe is simple, there are a few things that can go wrong. I have made every mistake you can think of over the years. I once used cold milk and it took forever to bake. Another time, I forgot the sugar! That was a very sad day for my taste buds. These tips will help you avoid the same problems I had so your first try is a total success. You can do this!
Pro Baking Tips
- Don’t Overmix: Mix only until the colors blend to keep the pie dense and smooth.
- Temperature Check: Make sure your milk is not freezing cold when you add it to the eggs.
- The Jiggle Test: Pull the pie out when the middle still moves slightly like a wave.
The Best Way to Serve

You must let this pie cool down completely before you try to cut it. If you cut it while it is hot, the custard will run out like a sauce. I recommend letting it sit on the counter for two hours. After that, put it in the fridge for another two hours. This wait is the hardest part, IMO, because the smell is so good! Once it is cold, it will slice perfectly and hold its shape on the plate.
You can serve it just as it is, or you can add a dollop of whipped cream on top. Some people like to serve it with fresh berries like raspberries or strawberries. The tart fruit goes really well with the sweet and creamy custard. It is a great light dessert after a big Sunday dinner. Most people will be surprised that you made something so beautiful from just eggs and milk.
How to Store Your Leftovers

If you have any pie left over, you must keep it in the fridge. Because it is made with eggs and milk, it cannot stay out on the counter for long. Cover the pie dish tightly with plastic wrap or foil. It will stay fresh and tasty for about three to four days. I actually think it tastes even better the next day because the flavors have more time to settle together.
Do not try to freeze this pie. Custard does not freeze well at all. When it thaws out, the water separates from the eggs and the whole thing becomes a mushy mess. This pie is best enjoyed fresh or from the fridge within a few days. If you find yourself with too much, just share a slice with a neighbor. They will definitely thank you for it!
Common Problems and How to Fix Them

If your pie cracks on top, it usually means the oven was too hot or you left it in too long. Do not worry! It will still taste great. You can hide the cracks with some whipped cream or a little extra nutmeg. If the bottom of your crust is soggy, next time try baking the crust a little longer before adding the filling. You can also try placing the pie on the lowest rack in your oven.
Sometimes the custard might look a little watery on the plate. This happens if the eggs get too hot and “break.” To prevent this, make sure you turn the oven down to 350 degrees as soon as the pie goes in. Every oven is a little bit different, so you might need to adjust the time by five minutes. Practice makes perfect, and even a “messy” custard pie is usually still delicious to eat.
Fun Ways to Change the Flavor
Once you know how to make the basic pie, you can start to have some fun with it. You can change the spices or the type of milk you use to create new flavors. I like to experiment during the holidays. It is a fun way to keep your family guessing what you will make next. Here are a few ideas to get you started on making this recipe your own.
Tasty Flavor Variations

You can add different extracts instead of vanilla. Almond extract is very strong, so just use a tiny bit. It gives the pie a nutty flavor that is very yummy. You could also stir in some lemon zest or orange zest to the milk. This makes the pie feel very bright and fresh for the springtime. Some people even like to add a little bit of cocoa powder to make a chocolate version, though that is a totally different treat!
Another idea is to swap the nutmeg for cinnamon or pumpkin pie spice. This is perfect for the fall months when everyone wants those warm flavors. You can even use coconut milk instead of cow milk if you want a tropical twist. Just remember that changing the fat content in the milk might change how long it takes to bake. Always keep an eye on that jiggle in the middle to know when it is done.
Your Pie Questions Answered
I know you might still have a few questions about making this pie. It is okay to be curious! Here are the answers to the things people ask me the most when they try this recipe for the first time.
Can I use low-fat milk for this pie?
You can, but the pie will be much thinner and less creamy. Whole milk gives the best results for a smooth and rich custard that holds its shape.
What if I do not have nutmeg?
You can use cinnamon instead, or just leave it off. The nutmeg is mostly for the traditional smell and look, but the pie still tastes good without it.
Why did my custard turn out watery?
This usually happens if the pie is overcooked or the oven is too hot. The eggs squeeze out the liquid when they get too tight. Try a lower heat next time.
How do I stop the crust from burning?
If the edges of your crust get dark too fast, cover them with small strips of aluminum foil. This protects the crust while the middle finishes cooking.
Do I have to bake the crust first?
You do not have to, but I highly recommend it. It keeps the bottom from getting soft and soggy when you pour in the liquid filling.
Enjoy Your Homemade Custard Pie
Making a smooth egg custard pie is a skill that will make you feel like a star in the kitchen. It is all about being gentle and patient with your ingredients. Now you have all the steps to make a dessert that is sweet, creamy, and perfect for sharing. Go ahead and give it a try today!