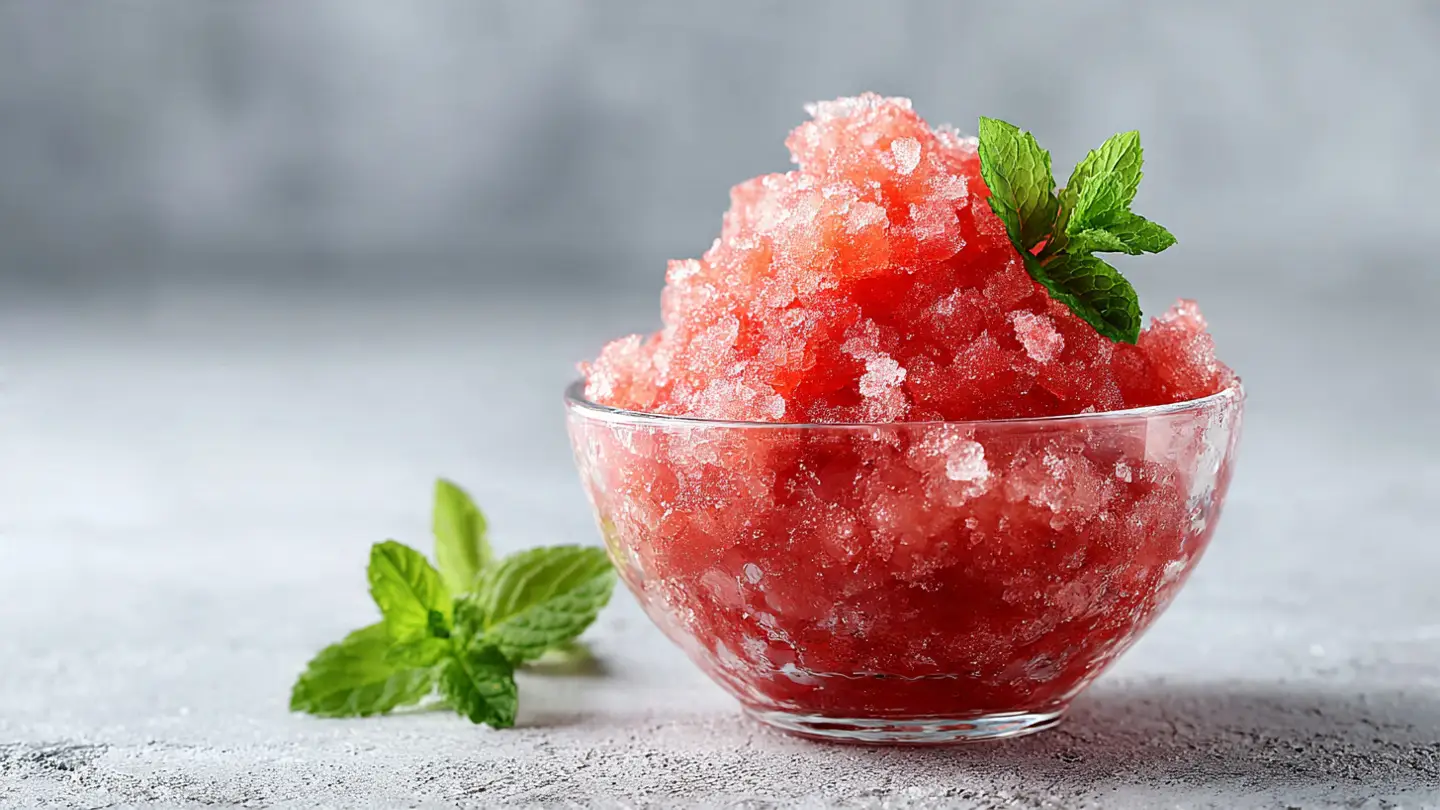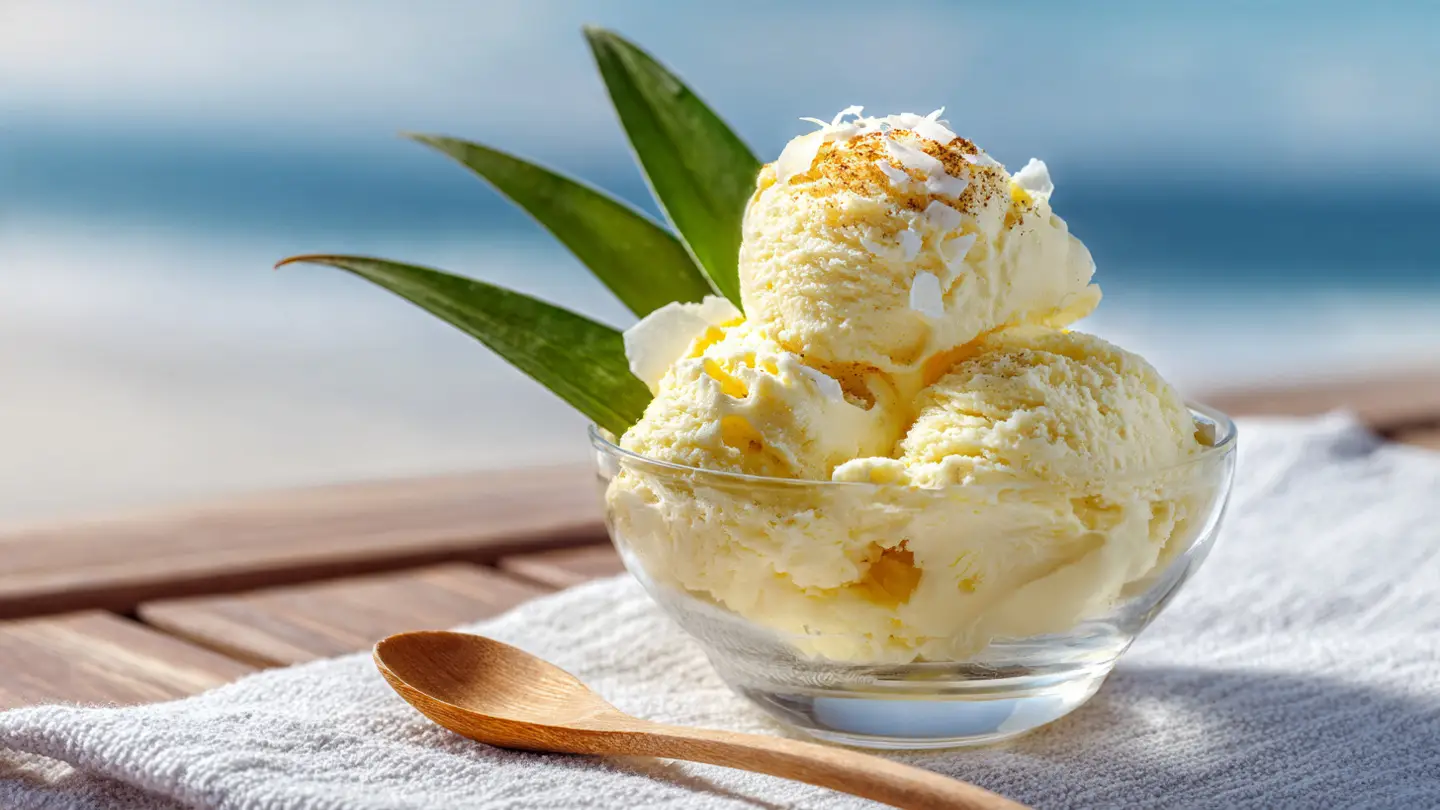
Tropical Painkiller Ice Cream with Pineapple and Rum
I love the beach. There is something about the sun and the sand that makes me feel happy. When I go to the beach, I always look for a cold drink. My favorite drink is called a Painkiller. It has pineapple, orange, and coconut. It also has a little bit of dark rum. It is sweet and cold and tastes like a vacation in a glass. One day, I thought about how good this would be as ice cream. I spent weeks trying to get it right in my kitchen. This recipe is the result of those messy tests.
Making ice cream at home can be hard if you do not have a good plan. I have made many batches that turned out like ice blocks. Nobody wants to eat a frozen brick. You want something smooth that melts on your tongue. In this article, I will show you how to turn a classic cocktail into a frozen snack. You will learn what ingredients to pick and how to mix them so they stay soft. This is a great treat for grown-ups who want a taste of the islands.
You do not need to be a chef to make this. It just takes a little time and some simple tools. I will walk you through every single step. By the end, you will have a bowl of sunshine to share with your friends. FYI, this does contain real rum, so keep it for the adults only! Let us get started on this creamy project.
Check out my list of tools below to make sure you have everything ready before you start.
Getting Ready for Your Tropical Kitchen Adventure
Before you turn on the stove or open a can of coconut milk, you need to be ready. Making ice cream is a bit like a science project. You have to measure things carefully. If you add too much liquid, it will be icy. If you add too much sugar, it will not freeze at all. I learned this the hard way when I once added a whole cup of rum. It stayed liquid for three days! I had to drink it with a straw instead of eating it with a spoon.
You should clear off your counter first. You need space for your bowls, your blender, and your ice cream machine. Make sure your freezer bowl is very cold. Most machines need the bowl to freeze for at least twenty-four hours. If you shake the bowl and hear liquid moving inside, it is not cold enough. Wait another day. It is worth the wait to get that perfect texture. I usually keep my bowl in the back of the freezer all summer just in case I get a craving.
Recipe Quick Info
- Prep Time: 30 minutes
- Cook Time: 10 minutes
- Servings: 8 people
- Difficulty: Medium
The Ingredients You Need to Buy

To make this taste like the real drink, you need the right stuff. The most important thing is the coconut. Do not just buy thin coconut milk in a carton. You need cream of coconut. This is thick and very sweet. It is what they use in bars to make drinks. It gives the ice cream a silky feel that you cannot get from anything else. If you use the wrong kind, your ice cream will feel grainy and thin. I always look for the cans that feel heavy when I pick them up.
Next, you need pineapple. I like using fresh pineapple because it tastes bright. You can use canned pineapple if you are in a rush. Just make sure you drain all the juice out first. If you leave the juice in, it adds too much water to the mix. For the rum, go for a dark or aged rum. It has a deep flavor that tastes like caramel. White rum is okay, but it does not have that warm punch we want here. Also, do not forget the nutmeg. A tiny pinch on top makes it smell like the Caribbean.
- 2 cups of heavy whipping cream
- 1 cup of whole milk
- 1 can (15 ounces) of cream of coconut
- 1 cup of fresh pineapple puree
- 1/2 cup of orange juice (no pulp)
- 3 tablespoons of dark rum
- 1/2 cup of granulated sugar
- A pinch of salt and ground nutmeg
The Special Tools for Success

You really need an ice cream maker for this recipe. Some people try to make ice cream by hand, but it is a lot of work. The machine stirs the mix while it freezes. This keeps big ice crystals from forming. I have an old machine that makes a lot of noise, but it works great. If you do not have one, you might be able to find one at a thrift store. They are very common and usually cheap. Just check that the motor still spins before you buy it.
A good blender is also key. You want to turn the pineapple into a very smooth liquid. If there are chunks of fruit in the ice cream, they will freeze into hard ice bits. Those bits are not fun to bite into. I use my blender for at least two minutes to make sure the fruit is totally pulverized. You will also need a big bowl and a whisk. A rubber spatula is helpful too. It helps you get every last drop of the sweet cream out of the blender and into the machine. Every drop counts!
Step by Step Guide to Painkiller Perfection
Now we get to the fun part where we actually make the food. This process has three main parts. First, we make the base. Second, we chill the base. Third, we churn it in the machine. You cannot skip the chilling part. If you put warm liquid into your ice cream maker, the bowl will melt before the ice cream gets thick. I have tried to rush it by using an ice bath, but it still works best if it sits in the fridge for a few hours. Patience is your best friend in the kitchen.
The rum is added at the very end. This is a secret tip. Alcohol does not freeze. If you put too much in at the start, the mix will never get hard. By adding just a few spoons at the end, you get the flavor without ruining the texture. It keeps the ice cream a little softer, which makes it easier to scoop. It is a win-win situation. Let us look at exactly how to put this all together so you can start eating sooner.
Blending the Tropical Fruit Base

Start by putting your pineapple chunks and orange juice into the blender. Turn it on high. I wait until it looks like a thick yellow soup. There should be no lumps at all. Once it is smooth, pour it through a fine strainer into a bowl. This catches any stringy bits from the fruit. I once skipped the straining and the ice cream felt like it had hair in it! That was a big mistake I never made again. Using the strainer makes the final product feel much more professional.
In a separate large bowl, whisk the cream of coconut with the sugar and salt. The cream of coconut can be thick and lumpy when you first open the can. You might need to stir it hard to make it smooth. Once it is ready, slowly whisk in the pineapple and orange mixture. The color will turn a pretty pale yellow. It should smell amazing right now. Try not to drink it all yet! It is tempting, but the ice cream will be even better than the liquid mix.
Mixing the Dairy and Chilling

Now it is time to add the heavy cream and the milk. Pour them into your fruit and coconut base. Whisk gently so you do not make too many bubbles. You want a smooth liquid, not a bowl of foam. If you have too many bubbles, the ice cream will have air pockets inside. Some people like airy ice cream, but for this flavor, I think a dense and rich texture feels more like a real cocktail. IMO, the richer the better when it comes to tropical flavors.
Cover the bowl with plastic wrap. Put it in the coldest part of your fridge. Leave it there for at least four hours. I usually leave mine overnight. This lets the flavors marry together. The coconut and pineapple need time to get to know each other. When the mix is very cold, it will freeze much faster in the machine. A fast freeze means smaller ice crystals. This is the secret to that “store-bought” smoothness that everyone loves. If you have a thermometer, aim for about 40 degrees Fahrenheit.
Churning Your Ice Cream

Set up your ice cream maker. Turn it on so the bowl starts spinning before you pour anything in. This prevents the mix from freezing to the sides instantly. Slowly pour your cold base into the machine. Watch it spin! This is the part that kids love to watch. It will start out as a thin liquid and slowly turn into something that looks like thick soft-serve. This usually takes about twenty to thirty minutes depending on your machine and how cold your room is.
When the ice cream looks thick and holds its shape, it is time for the rum. Drizzle the three tablespoons of dark rum into the machine while it is still running. Let it mix for just one or two more minutes. You will notice the ice cream might soften slightly. That is normal. The alcohol is doing its job. Stop the machine and use your spatula to scrape the ice cream into a freezer-safe container. I like using a long metal pan because it helps the ice cream freeze evenly and looks cool when you scoop it later.
Expert Tips for Better Scoops
- Don’t Over-Churn: Stop as soon as it looks like soft-serve or it might get a buttery film.
- Fresh Is Best: Use a real nutmeg nut and grate it fresh for the best smell.
- Chill the Pan: Put your storage container in the freezer for an hour before filling it.
Hardening and Serving the Treat

Your ice cream is still a bit soft right after churning. Most people call this the “soft-serve stage.” If you like it that way, you can eat it now! But for the best scoops, you should put it in the freezer for four to six hours. This is called “ripening.” It lets the ice cream firm up so you can get those perfect round balls with your scooper. Press a piece of parchment paper or plastic wrap directly onto the surface of the ice cream before closing the lid. This stops ice from growing on the top.
When you are ready to serve, take the container out of the freezer for five minutes. This lets it soften just enough to scoop easily. Use a heavy metal scoop. Put two big scoops into a chilled bowl or a fancy glass. To make it look like the drink, sprinkle a little bit of ground nutmeg on top. You can even add a small wedge of fresh pineapple or a maraschino cherry. It looks so pretty that your guests will think you bought it from a fancy shop. It is the ultimate summer dessert.
Customizing Your Frozen Cocktail
I know not everyone likes the same things. Some people want more fruit, and some people want it more boozy. The great thing about making food at home is that you are the boss. You can change things to fit your taste. If you do not like rum, you can leave it out. The ice cream will still taste like a Virgin Painkiller. It will be just as delicious for kids or people who do not drink. I have made it both ways and everyone always asks for seconds.
You can also play with the fruit. While the traditional drink uses pineapple and orange, you could try mango or even passion fruit. These fruits are very tropical and go great with coconut. Just keep the total amount of fruit puree the same so the recipe stays balanced. If you change too much at once, the texture might change. But that is how you learn! Every mistake in the kitchen is just a lesson for the next time you cook. Don’t be afraid to try something new.
Alternative Toppings and Mix-ins

If you want some crunch in your ice cream, you can add mix-ins. I love adding toasted coconut flakes. You can buy them at the store or toast them yourself in a pan for two minutes. Wait until the ice cream is almost done churning before you dump them in. This keeps them from getting soggy. Another good idea is bits of dried pineapple. They are chewy and sweet and add a different texture to every bite. It makes the ice cream feel more like a sundae.
For a really fancy look, you can make a rum caramel sauce to pour over the top. Just melt some butter and brown sugar in a pan, add a splash of cream and a tiny bit of rum. Let it bubble until it is thick. Pouring warm sauce over cold ice cream is one of the best things in the world. It creates a mix of hot and cold that feels very special. You can also use a simple squirt of lime juice if you want to cut through the sweetness. The lime makes the pineapple flavor pop even more.
Making it Without an Ice Cream Maker

I told you that a machine is best, but what if you don’t have one? You can still make this! This method is called “still freezing.” You pour the cold mix into a shallow metal pan and put it in the freezer. Every thirty minutes, you take it out and stir it hard with a fork or a whisk. You have to break up all the ice crystals that form on the edges. You do this for about three hours until it is too thick to stir anymore. It takes effort, but it works.
The texture will be more like a granita or a firm sorbet than a creamy ice cream. It will still taste like a Painkiller, though! To help make it creamier without a machine, you could fold in some whipped cream at the start. Whip the heavy cream until it has soft peaks, then gently mix it into the coconut and fruit base. This adds air into the mix manually. It is a bit of a workout for your arms, but your friends will be impressed that you made ice cream by hand. Just remember to stir often!
Frequently Asked Questions
Can I make this without alcohol?
Yes! Just leave the rum out. It will still taste like a tropical dream. It is perfect for kids and will freeze even harder without the booze.
How long does this stay good in the freezer?
It is best if you eat it within two weeks. After that, it might start to get ice crystals or lose its bright fruit flavor. Keep it tightly covered!
What if I cannot find cream of coconut?
You can use full-fat coconut milk, but add 1/2 cup more sugar. Cream of coconut is much sweeter and thicker, so the extra sugar helps match that taste.
Why is my ice cream too hard to scoop?
Homemade ice cream doesn’t have the softeners that store brands use. Let it sit on the counter for 5-10 minutes before you try to scoop it.
Can I use orange juice from a carton?
Sure! Just make sure it has no pulp. Pulp can feel weird when it is frozen. Freshly squeezed juice always tastes a little better if you have time.
Enjoy Your Homemade Island Treat
Making Tropical Painkiller Ice Cream is a fun way to bring the beach to your home. It uses simple ingredients to make a very fancy dessert. Remember to chill your base and don’t add too much rum! Now go enjoy a big scoop of paradise.