Light and Fluffy Divinity Candy
Divinity candy is a classic treat that many people remember from their grandma’s kitchen. It is bright white, very sweet, and feels like eating a sugary cloud. Some people call it a mix between fudge and marshmallow. It is a special candy that shows up mostly during the winter holidays. I remember watching my aunt whip up big bowls of this white fluff when I was a little kid. It looked like magic how clear syrup turned into snowy peaks.
Making this candy at home can feel a bit scary if you have never tried it. You have to get the sugar temperature just right and beat the egg whites until they are strong. But do not worry because I am going to walk you through every single step. We will talk about the tools you need and the weather tricks that make a huge difference. By the end of this page, you will know how to make the best divinity candy on your block. It is a fun skill to learn and tastes way better than anything from a store.
Ready to turn your kitchen into a candy shop? Let us look at what you need to get started on this sweet adventure.
The Secrets to Perfect Divinity Candy
Before you grab your sugar, there is one big rule you must know about divinity. This candy is very picky about the air around it. If it is raining or very humid outside, the candy might stay sticky and never set up. The sugar pulls moisture from the air like a sponge. I once tried making this on a stormy afternoon, and it turned into a gooey mess that I had to eat with a spoon! Always check the weather report before you start boiling your syrup.
You also need to be patient. This is not a snack you can rush in five minutes. It takes time for the syrup to cook and even more time for the mixer to do its job. If you try to stop too early, the candy will flatten out into puddles instead of staying in fluffy mounds. Having a good stand mixer is a huge help because your arms will get very tired if you try to hold a hand mixer for fifteen minutes straight. Let us look at the simple things you need to have ready on your counter.
The Short List of Ingredients

You do not need many things to make this candy. Most of these items are probably in your pantry right now. The main base is sugar and corn syrup. The corn syrup is important because it stops the sugar from turning into hard crystals. It keeps everything smooth and soft. You will also need egg whites, which give the candy its lift and airy texture. Use large eggs for the best results. A pinch of salt helps balance all that sweetness so it is not too much at once.
- 2 cups granulated white sugar
- 1/2 cup light corn syrup
- 1/2 cup hot water
- 1/4 teaspoon salt
- 2 large egg whites (at room temperature)
- 1 teaspoon pure vanilla extract
- 1 cup chopped pecans (optional but very good)
Make sure your egg whites are at room temperature. They whip up much better and get bigger than cold eggs from the fridge. Also, use real vanilla extract if you can. It smells much better and gives the candy a warm flavor that pairs perfectly with the sugar. If you do not like pecans, you can leave them out or use walnuts instead. Some people even like to add dried cranberries for a pop of color during Christmas time.
Getting Your Kitchen Ready

Preparation is the most important part of candy making. Once the sugar reaches the right heat, things move fast. You do not want to be searching for a spoon while your syrup is burning! Start by lining two large baking sheets with parchment paper or wax paper. This stops the candy from sticking to the pans. I like to use a little bit of butter on my spoons too. It helps the candy slide off easily when I am dropping it onto the paper.
Clean your mixing bowl very well. Any bit of grease or oil will stop the egg whites from getting fluffy. I usually wipe my bowl and the whisk attachment with a little bit of lemon juice or vinegar first. This removes any hidden oil. Set up your stand mixer and make sure it is plugged in. Clip your candy thermometer to the side of your saucepan. Make sure the tip of the thermometer is not touching the bottom of the pan, or it will give you a wrong reading. You want to measure the heat of the liquid, not the metal pan.
Cooking the Sugar Syrup

Put your sugar, corn syrup, water, and salt into a heavy saucepan. Turn the heat to medium and stir it until the sugar dissolves. Once it starts to boil, stop stirring! This is a hard rule to follow, but it is vital. If you stir the boiling syrup, you might push sugar crystals onto the sides of the pot. Those crystals can fall back in and make your whole batch of candy grainy. If you see sugar on the sides, you can use a wet pastry brush to wash it down into the liquid.
Let the mixture boil until it reaches 260 degrees Fahrenheit. This is known as the hard ball stage. It means if you dropped a bit of the syrup into cold water, it would form a hard, firm ball. This takes about 10 to 15 minutes depending on your stove. Keep a close eye on the thermometer. When it gets to 250 degrees, start whipping your egg whites in the mixer. You want the eggs to be at stiff peaks right when the syrup hits 260. If the eggs are ready too early, just turn the mixer to the lowest setting to keep them moving.
Mixing the Fluff Together

This is the part where the magic happens. Turn your mixer to medium speed. Slowly pour the hot syrup in a thin stream down the side of the bowl. Do not pour it directly onto the whisk, or it might splash hot sugar on you. It could also make threads of sugar that harden instantly. Keep pouring slowly until all the syrup is in the bowl. This cooks the egg whites and makes them safe to eat. It also starts to build the structure of the candy.
Now, turn the mixer up to high. You are going to beat this mixture for a long time. It usually takes about 5 to 10 minutes. You are looking for the shine to go away. The candy will start as a glossy, bright white and slowly turn dull. It will also get very thick. A good test is to lift the whisk. If the candy holds its shape and stays on the whisk, it is ready. If it runs off, keep beating! One time I stopped too soon because my hand was tired, and the candy just turned into a flat sheet. Don’t be like me; wait for that dull look.
Adding Flavor and Texture

Once the candy is thick and has lost its shine, it is time for the final touches. Turn off the mixer and add your vanilla extract. If you are using nuts, fold them in now with a sturdy spoon or spatula. The mixture will be very heavy and sticky, so you will need a bit of muscle here. The pecans add a nice crunch that breaks up the soft texture of the candy. It makes the treat feel more balanced. IMO, the nuts are what make divinity really special.
You have to work fast during this stage. As the candy cools, it starts to set. If you wait too long, it will get too hard to move. This is why having your pans ready is so helpful. Some people like to add a tiny bit of food coloring here if they are making treats for a baby shower or a specific holiday. A drop of pink or green can look very pretty against the white. Just make sure you do not add too much liquid, or the candy will get soft again.
Scooping and Cooling the Candy

Now you get to make the little clouds. Use two spoons to scoop the candy. Take a big spoonful with one spoon and use the second spoon to push it off onto the parchment paper. Try to leave a little swirl on the top of each piece. This makes them look professional and cute. Space them about an inch apart so they do not touch. They do not spread much, but you want them to have air around them so they can dry properly.
Let the candy sit at room temperature for at least two hours. Do not put them in the fridge! The fridge is too damp and will make them sticky. They need dry air to firm up. You will know they are done when you can touch the top and it feels dry and firm, not tacky. Depending on how much moisture is in your house, it might even take overnight. Be patient and let them rest. Once they are firm, you can peel them off the paper and see the beautiful white bottoms.
Recipe Quick Info
- Prep Time: 15 minutes
- Cook Time: 15 minutes
- Servings: 30 pieces
- Difficulty: Medium
Storing Your Sweet Treats

Divinity candy lasts a long time if you keep it away from air. Put the pieces in an airtight container. If you have to stack them, put a piece of wax paper between the layers. This stops them from sticking together if the room gets a bit warm. They will stay fresh and tasty for about two weeks at room temperature. They are great for giving as gifts because they do not crumble easily like cookies do.
Do not freeze divinity candy. The freezing and thawing process can change the texture and make it grainy. If you live in a very humid place, you might want to put a small piece of bread or a silica packet in the container to soak up extra moisture. But usually, a good tight lid is all you need. These are perfect to have in a jar on the counter for when guests stop by. Everyone loves a little bite of something sweet with their coffee or tea.
Fun Ways to Serve Divinity

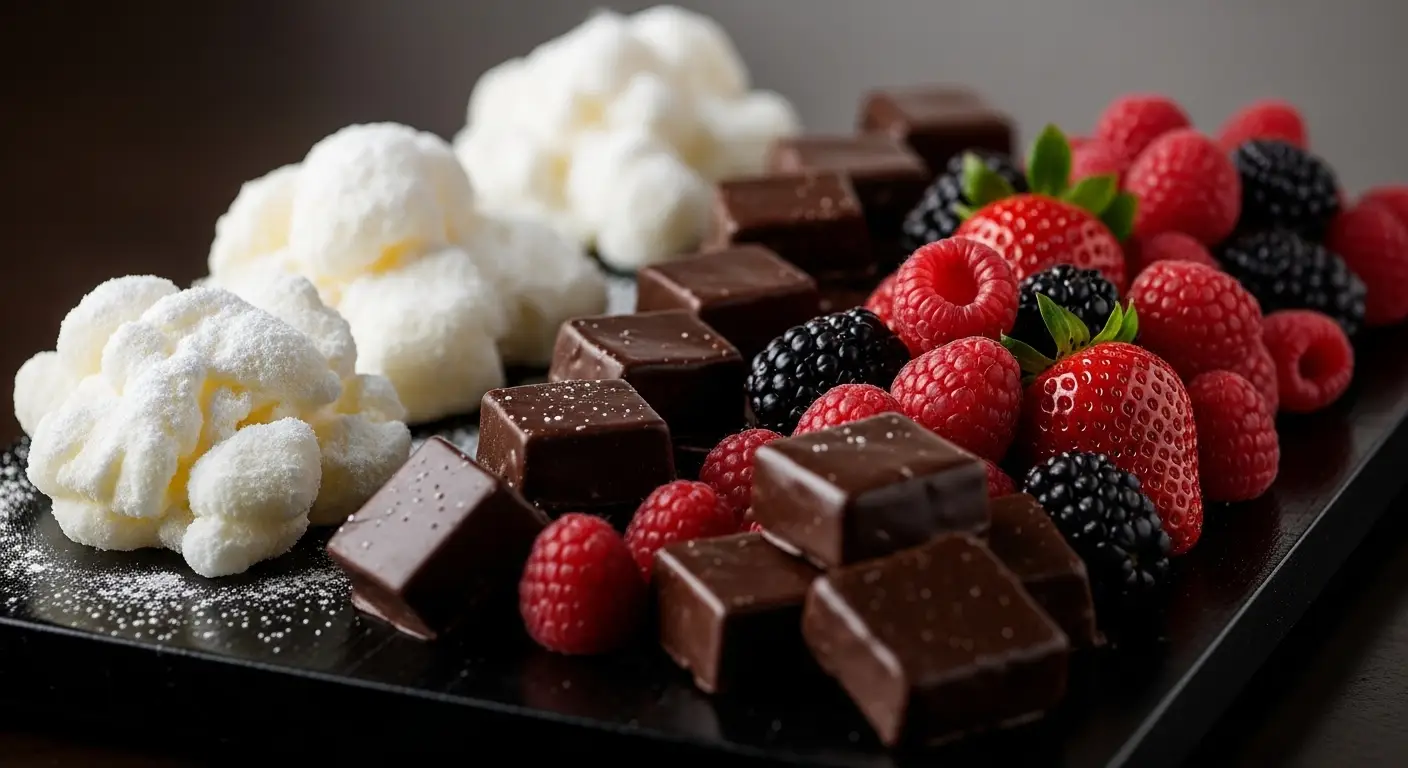
While divinity is amazing on its own, you can dress it up for parties. I like to serve it on a big wooden board with other treats. The bright white color looks amazing next to dark chocolate or bright red strawberries. You can also dip the bottom of the cooled candy into melted chocolate for an extra fancy look. Just let the chocolate harden before you serve them. It adds a rich flavor that goes great with the sweet vanilla cloud.
Another idea is to crumble a few pieces over a bowl of vanilla ice cream. It adds a sweet crunch that is better than sprinkles. You can also use it as a topping for a festive cake. Since it looks like snow, it is perfect for winter-themed desserts. No matter how you serve it, people will be impressed that you made it from scratch. It feels like a very fancy candy even though the ingredients are so simple. Just remember to tell everyone there are nuts inside if you added pecans!
Pro Tips for Success
- Check the Weather: Only make this on dry days. Humidity is the enemy of fluffy divinity.
- No Stirring: Once the sugar boils, leave it alone to prevent crystals from forming.
- Wait for the Dull Look: Don’t stop mixing until the gloss is gone and it holds its shape.
- Room Temp Eggs: They whip up much bigger and better than cold eggs.
Common Questions About Divinity
Why did my divinity candy stay soft and sticky?
It was likely too humid outside or you did not cook the syrup to 260 degrees. High moisture prevents the candy from drying and setting properly.
Can I use a hand mixer instead of a stand mixer?
You can, but it is very hard. The mixture gets very thick and heavy. Your arm will get tired, and a small hand mixer might overheat during the 10 minutes of beating.
My candy is grainy. What happened?
This usually happens if you stir the syrup while it is boiling or if you didn’t use enough corn syrup. Sugar crystals formed and ruined the smooth texture.
Can I make this without corn syrup?
It is very hard. Corn syrup stops the sugar from turning into crystals. You could try cream of tartar, but light corn syrup is the best way to get a perfect result.
Enjoy Your Homemade Divinity
You now have all the tools to make beautiful, fluffy divinity candy right in your own kitchen. It takes a little bit of practice to get the timing perfect, but the reward is a sweet treat that everyone will love. FYI, this candy makes the best holiday gift for neighbors! Just remember to watch the weather and keep beating that mixture until the shine fades away. Happy candy making!