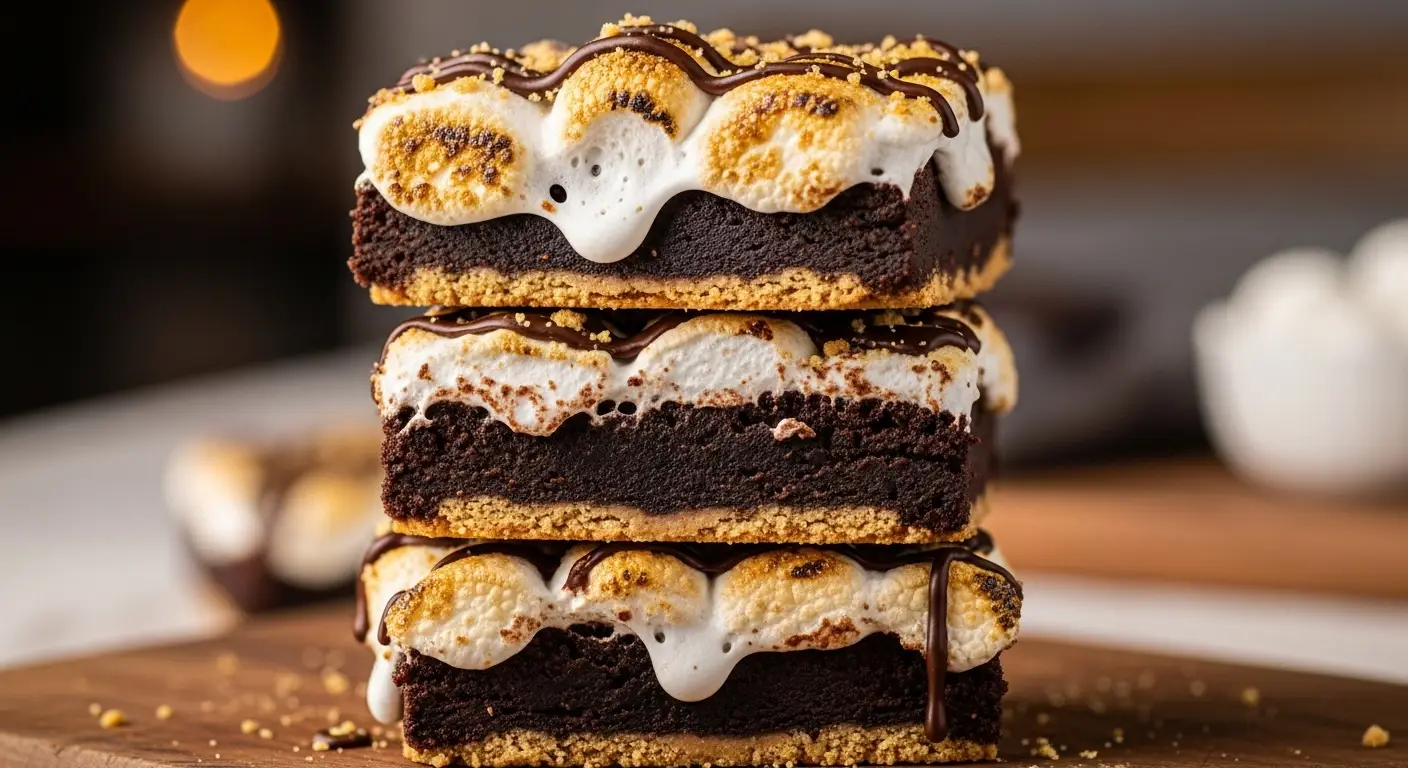
Smores Brownies
I love camping, but I do not always love the bugs and the hard ground. Sometimes I just want the taste of a campfire treat without leaving my warm kitchen. That is why I started making these Smores Brownies. They have everything you love about the classic snack but in a thick, chewy bar form.
In this article, you will learn how to build these brownies from the bottom up. We will start with a buttery crust, add a rich chocolate layer, and finish with gooey marshmallows. It is the perfect dessert for parties or a rainy day at home. Everyone who tries them will ask for the recipe because they taste just like summer vacation.
Ready to get baking? Let’s grab our mixing bowls and get started on these treats!
Why You Will Love This Recipe
These brownies are a huge hit because they mix three different textures into one bite. You get the crunch from the crackers, the soft chocolate, and the sticky marshmallow top. It is much easier than making individual s’mores for a big group of people. Plus, you do not need a real fire to get that toasted flavor on top.
I have made these for school bake sales and family dinners. They always disappear fast. If you like chocolate, this is the dessert for you. It is simple enough for kids to help with, but it looks fancy enough for a holiday party. Even if you are not a pro baker, you can master this recipe on your first try.
The Best Ingredients for Smores Brownies

To make these brownies taste amazing, you need the right stuff. I always start with high-quality graham crackers for the base. You can buy the pre-crushed crumbs, but I like crushing them myself. It feels more like real cooking when I get to smash them into tiny bits. For the chocolate part, use a good cocoa powder that is unsweetened. It makes the flavor deep and dark, which balances the sweet toppings.
Butter is another big deal here. I use unsalted butter so I can control the salt. If you only have salted butter, just skip the extra pinch of salt in the recipe. For the marshmallows, mini ones work best. They melt faster and cover the top more evenly than the big ones. You can also add some chocolate chips into the batter if you want extra chocolate in every single bite.
Gather Your Kitchen Tools

You do not need a fancy kitchen to make these. I use a basic 8-inch square baking pan. If you use a bigger pan, the brownies will be thin and might get dry. A glass or metal pan both work fine, but metal usually gives sharper edges. I also suggest using parchment paper. This is a life saver! It lets you lift the whole block of brownies out of the pan once they are cool.
You will also need a few mixing bowls. One small bowl is for melting butter and mixing the crust. One large bowl is for the brownie batter. A sturdy spatula or a big spoon is enough for mixing. You do not even need an electric mixer for this recipe. Mixing by hand is fast and helps you make sure you do not over-mix the flour, which keeps the brownies soft and fudgy.
Recipe Quick Info
- Prep Time: 20 minutes
- Cook Time: 35 minutes
- Servings: 16 squares
- Difficulty: Easy
The Perfect Graham Cracker Crust

The crust is the foundation of the whole dessert. I once tried making these without a crust, and they just felt like regular brownies. The graham cracker layer adds a salty and sweet crunch that makes them special. To make it, you mix the crumbs with melted butter and a little bit of sugar. It should feel like wet sand when you are done mixing. If it is too dry, it will fall apart after baking.
Press the crumbs into the bottom of your lined pan. I use the bottom of a heavy measuring cup to push it down really hard. You want it to be flat and tight. I bake the crust for about 8 minutes before adding the chocolate. This keeps it from getting soggy when the brownie batter goes on top. It is a small step, but it makes a huge difference in the final texture of your treat.
Mixing the Fudgy Brownie Batter

The brownie layer is the star of the show. My recipe uses melted butter instead of oil because it tastes richer. I mix the sugar and melted butter first until they are well blended. Then, I add the eggs one at a time. A quick tip I learned is to beat the eggs well. This creates that thin, crackly top that people love on brownies. Next, stir in the vanilla and the dry ingredients like cocoa and flour.
Be careful not to mix too much once you add the flour. If you stir too long, the brownies will become tough like bread. We want them to be fudgy and dense. I usually stop stirring as soon as I can’t see any more white flour streaks. Pour the batter over your pre-baked crust and spread it out to the corners. Now your kitchen will start to smell like a chocolate factory!
Baking to Perfection

Baking is where the magic happens. Put your pan in the center of the oven. I bake mine at 350 degrees. Every oven is a little bit different, so start checking them a few minutes early. You want a toothpick stuck in the middle to come out with just a few moist crumbs. If the toothpick is wet with batter, they need more time. If it comes out totally clean, take them out fast so they don’t dry out.
I made a mistake once by leaving them in too long because I thought they looked too soft. Remember, brownies keep cooking for a few minutes after you take them out of the hot oven. They will firm up as they cool down. This is the hardest part because you have to wait while the whole house smells like chocolate. But hold on, because we still have to add the best part: the toasted marshmallows!
Adding the Smores Topping

Once the brownies are almost done, it is time for the topping. I pull the pan out and dump a whole bag of mini marshmallows on top. I also like to push a few pieces of broken graham crackers and some chocolate bar chunks into the marshmallows. This makes them look like real s’mores. Put the pan back in the oven under the broiler for just a minute or two. You have to watch them the whole time!
Marshmallows go from white to burnt in about five seconds. I usually sit right in front of the oven door and peek through the glass. Once they turn a nice golden brown, pull them out. If you do not have a broiler, you can just use the regular oven heat, but it takes longer and the marshmallows might melt into a flat puddle instead of staying puffy. I think the puffy, toasted look is much better for photos and eating.
How to Cut Clean Squares

Cutting these can be a sticky mess if you are not careful. The marshmallows are like glue once they melt. The secret is to let the brownies cool completely. I know it is hard to wait, but it is worth it. I often put my pan in the fridge for an hour to make the chocolate solid. When they are cold, they are much easier to handle and won’t fall apart when you lift them out using the parchment paper.
I use a large, sharp knife to make the cuts. Between every single cut, I wipe the knife clean with a wet paper towel. This keeps the marshmallow from sticking to the blade and dragging through the chocolate. It takes a little more time, but you get those perfect, pretty squares that look like they came from a bakery. If you are just eating them with family, you can skip the cleaning and just dive in with a spoon!
Baker’s Tips for Success
- Don’t Overbake: Take them out when the middle still jiggles just a tiny bit.
- Use Foil: If you run out of parchment, foil works if you grease it with lots of butter.
- Toast Safely: Always keep the oven door cracked an inch when using the broiler.
Serving and Storing Your Treats

These brownies are very rich, so I usually cut them into small squares. They go perfectly with a big glass of cold milk or a scoop of vanilla ice cream. If you want to be extra, you can drizzle some caramel sauce over the top before serving. They are best served at room temperature, but some people like them cold from the fridge. IMO, they are best when the marshmallow is still a little bit soft.
If you have leftovers, you can keep them in an airtight container for about three days. Do not put them in a spot that is too warm, or the marshmallows will get extra sticky. I do not recommend freezing these because the marshmallows can get a weird texture when they thaw out. They are so good that they usually don’t last more than a day anyway! My friends always finish the whole batch before I can even put the lid on the container.
Fun Questions About Smores Brownies
Can I use large marshmallows instead of mini ones?
Yes, but you should cut them in half. Smaller pieces melt better and cover the brownie more evenly so you get a bit in every bite.
What if I do not have graham crackers?
You can use crushed digestive biscuits or even vanilla wafers. Any crunchy, sweet cookie will make a good crust for these brownies.
Can I make these gluten-free?
Yes! Use gluten-free graham crackers and a 1-to-1 gluten-free flour blend for the brownie batter. They still taste great.
Why did my marshmallows catch on fire?
The broiler is very hot. You must watch them every second. If they get too close to the heating element, they will burn fast.
Can I use a boxed brownie mix?
Sure! Just make the crust first, pour the box mix on top, and add the marshmallows at the end. It saves time and works well.
Time to Enjoy Your Brownies
You now have all the steps to make the best Smores Brownies ever. They are crunchy, chocolatey, and toasted just right. I hope you have as much fun making them as you do eating them. Happy baking!