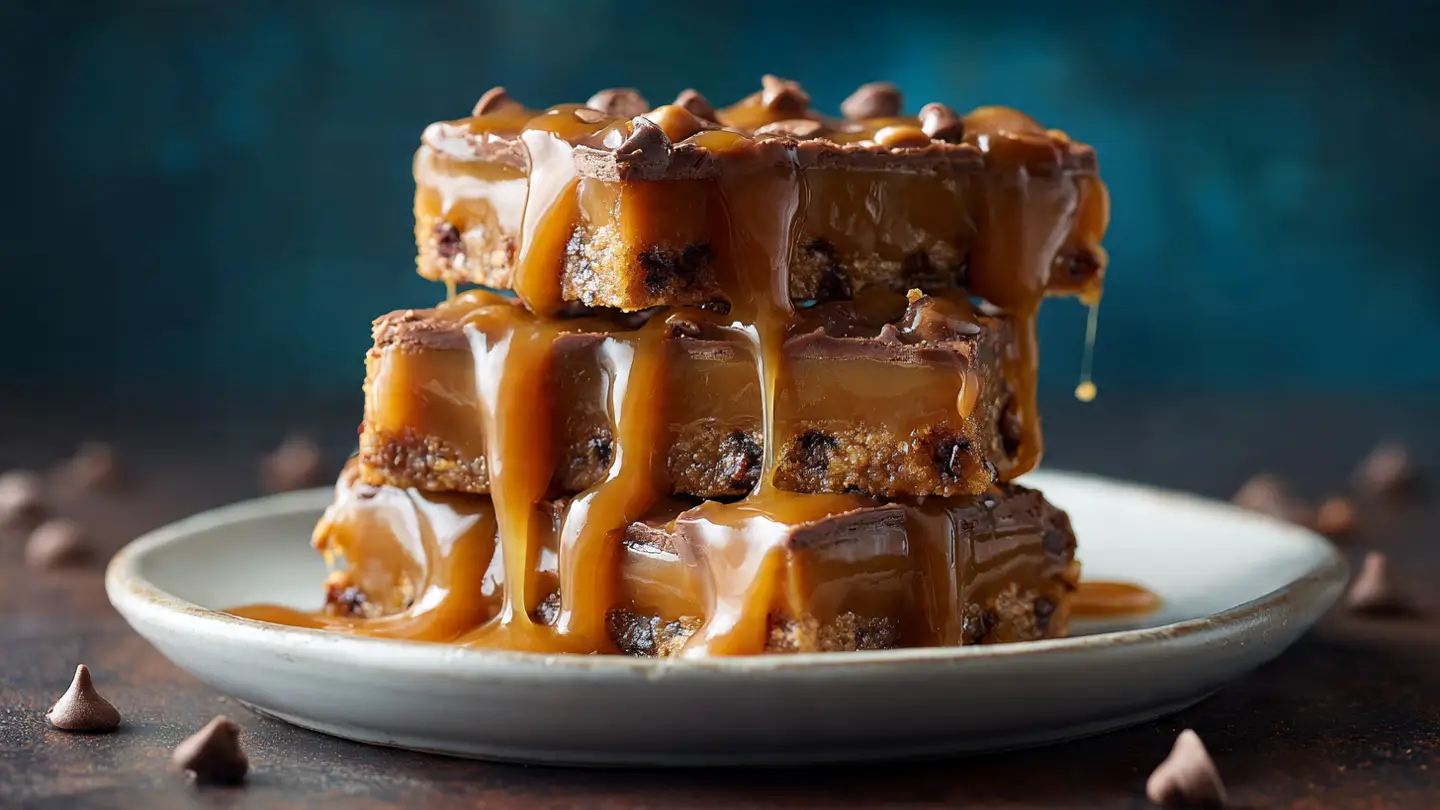
Gooey Knock You Naked Bars with Caramel and Chocolate
Are you ready for the best dessert of your life? These bars are thick, sweet, and full of gooey caramel. I first made these for a bake sale at my kid’s school. They were gone in ten minutes. Everyone wanted the recipe and some people even asked for the secret ingredient. The truth is that they are very easy to make at home.
In this post, I will teach you how to bake these famous bars. We will use a simple cake mix to save time. You will learn how to melt caramel and layer it with chocolate chips. I will also share some tips to make sure your bars do not stick to the pan. Grab your apron and let’s get baking!
Want to be the star of the next party? Just bring a tray of these treats.
The Story of This Sweet Treat
I found this recipe years ago in an old cookbook. It had a funny name that made me laugh. I wondered why they were called “Knock You Naked” bars. Then I took a bite and I understood. They are so good they make you forget everything else! They have a soft cookie base and a messy middle that stays soft even when the bars are cold. It is a mix of textures that feels like a hug for your mouth.
One time, I tried to make these without enough butter. It was a huge mistake. The dough was dry and crumbly like sand. I learned that you need plenty of fat to make the cake mix turn into a soft dough. Since then, I always measure my butter twice. If you follow my steps, your bars will turn out perfect every single time. These are great for people who love very sweet snacks.
The Ingredients You Need

Before you start, make sure you have everything on your counter. You need one box of yellow cake mix. You can also use German chocolate cake mix if you want a double chocolate version. You will need a lot of butter. Do not use margarine here because the flavor is not the same. Real butter makes the crust taste like a high-quality cookie.
The middle layer needs a bag of chewy caramels. I buy the ones wrapped in plastic. You also need evaporated milk. Make sure you do not buy sweetened condensed milk by mistake. They look the same but they act differently in the oven. Lastly, you need a big bag of semi-sweet chocolate chips and some chopped pecans. The nuts are optional, but they add a nice crunch to the gooey center.
- 1 box of yellow cake mix
- 3/4 cup melted butter
- 2/3 cup evaporated milk (split into two parts)
- 1 bag (11 ounces) of caramels
- 1 cup semi-sweet chocolate chips
- 1/2 cup chopped pecans (if you like nuts)
Preparing Your Baking Pan

This is the most important step for this recipe. If you skip this, you will never get the bars out of the pan. Caramel is like glue. It will stick to your pan and stay there forever. I always use parchment paper. I cut a long strip and lay it across the pan. I make sure some of the paper hangs over the sides. These are like little handles.
Once the bars are cold, you can just lift the whole block out. It makes cutting them into squares so much easier. If you do not have paper, use a lot of butter or baking spray. But really, go buy some parchment paper. It is a lifesaver in the kitchen. I learned this the hard way after scrubbing a pan for an hour! FYI, aluminum foil also works if you grease it well.
Recipe Quick Info
- Prep Time: 15 minutes
- Cook Time: 25 minutes
- Servings: 16 bars
- Difficulty: Easy
Mixing the Dough Base

Start by heating your oven to 350 degrees. In a big bowl, dump the dry cake mix. Add your melted butter and half of the evaporated milk. Use a big spoon or your hands to mix it. It will not look like a normal cake batter. It will be very thick and a bit oily. This is exactly what you want. It should feel like soft play-dough.
Take half of this dough and press it into the bottom of your lined pan. Use your fingers to push it into the corners. Try to make it a flat, even layer. Put the pan in the oven for about 8 to 10 minutes. This “pre-bakes” the bottom crust so it stays strong. While that is baking, you can work on the caramel sauce. Do not eat all the dough yet, even though it tastes good!
Melting the Perfect Caramel

Now we make the star of the show. Unwrap all your caramels and put them in a small pot. Add the rest of your evaporated milk. Turn the heat to medium-low. You must stay by the stove and stir the whole time. If you walk away, the caramel might burn. Burnt caramel smells bad and tastes bitter. No one wants that.
Keep stirring until the lumps are gone and the sauce is smooth. It should look like liquid gold. If you find the caramels are taking too long to melt, you can use a microwave. Put them in a microwave-safe bowl and heat for 30 seconds at a time. Stir between each turn. I prefer the stove because I can see it better. It gives me more control over the heat.
Expert Baking Tips
- Temperature: Let the caramel cool for 2 minutes before pouring so it does not soak into the bottom crust too fast.
- Salt: Add a pinch of sea salt to the caramel to make the flavor pop.
Layering the Chocolate and Caramel

Take the pan out of the oven after the first bake. The crust will be light gold. Now, sprinkle your chocolate chips all over the hot crust. If you are using nuts, sprinkle the pecans now too. The heat from the crust will start to melt the chocolate a little bit. That is fine. It helps everything stick together.
Pour the hot caramel sauce over the chocolate chips. Try to cover as much area as you can. It will spread out on its own as it heats up. This middle layer is what makes these bars so gooey. I like to use semi-sweet chips because the caramel is already very sugary. Using milk chocolate might make it too sweet for some people, but it is up to you. IMO, the darker chips balance the sugar better.
Adding the Top Layer

Now you have to use the rest of the dough. Since the dough is thick, you cannot just pour it on. You have to break it into small pieces. Flatten a piece of dough in your hands and lay it on top of the caramel. Do this until most of the caramel is covered. It is okay if there are some small holes. The caramel bubbling up through the holes looks very pretty once it is done.
Put the pan back in the oven. Bake for another 15 to 18 minutes. The top should look set and the edges should be a nice brown color. The middle will still look a bit wiggly. Do not worry! It will firm up as it cools down. If you bake it until the middle is hard, the bars will be too tough to chew. Trust the timer and the look of the edges.
The Hard Part: Waiting

This is the part everyone hates. You have to let the bars cool completely. If you try to cut them while they are hot, the caramel will run out like water. You will have a giant mess on your hands. I usually leave them on the counter for an hour. Then I put them in the fridge for another hour. This makes the caramel set into a soft fudge texture.
I know they smell amazing. I know you want to grab a spoon and eat it right now. But please wait! Your patience will be rewarded with perfect, clean squares. If you are in a rush, you can put the pan in the freezer for 30 minutes. Just make sure the pan is not glass if you put it in the freezer while it is super hot, or it might crack!
How to Cut and Serve

Once the bars are cold, lift them out using the parchment paper. Place the whole block on a cutting board. Use a large, sharp knife. To get very clean cuts, you can dip your knife in hot water and wipe it dry between each cut. This stops the caramel from sticking to the blade. I usually cut these into small squares because they are very rich.
These bars go great with a glass of cold milk or a cup of bitter coffee. They are very heavy, so one small piece is usually enough for most people. If you want to be extra, you can serve them warm with a scoop of vanilla ice cream. Just pop a single square in the microwave for ten seconds before adding the ice cream. It is like a fancy restaurant dessert!
Keeping Your Bars Fresh
If you have any leftovers, you need to store them right. You can keep them in an airtight container at room temperature for about three days. If your house is very warm, the caramel might get too soft. In that case, keep them in the fridge. They will last for a week in the refrigerator. I actually think they taste better when they are slightly cold.
You can also freeze these bars! Wrap each square in plastic wrap and put them in a freezer bag. They stay good for up to three months. This is perfect for when you want a quick treat but do not want to bake a whole batch. Just let a bar sit on the counter for twenty minutes to thaw out. It will be just as gooey as the day you made it. This is a great way to save money on snacks for school lunches.
Nutrition Facts
- Calories: 280 per bar
- Sugar: 22g
- Fat: 14g
- Note: These are a special treat, not a salad! Enjoy them in moderation.
Common Questions About These Bars
Can I use a different cake mix?
Yes! Chocolate cake mix works great for a deeper flavor. White cake mix works too but yellow has a buttery taste that fits the caramel best.
What if I cannot find evaporated milk?
You can use heavy cream instead. Do not use regular milk as it is too thin and the caramel sauce will not set properly.
Why is my caramel layer so hard?
You likely cooked the caramel too long or at too high of a heat. It only needs to melt until smooth, not boil for a long time.
Can I make these nut-free?
Absolutely. Just leave out the pecans. You can add extra chocolate chips or even some crushed pretzels for a salty crunch instead.
How do I stop the dough from sticking to my hands?
Rub a little bit of butter or oil on your palms before pressing the dough into the pan. It keeps the sticky dough from clinging to your skin.
Enjoy Your Homemade Treats
These bars are a classic for a reason. They are easy to make but taste like you spent all day in the kitchen. Whether you are making them for a party or just a quiet night at home, they are sure to make everyone happy. Just remember to use parchment paper and let them cool down before you eat. Now go enjoy a big square of caramel goodness!