Quick Peach Dump Cake for Busy Evenings
Do you ever have those days where you really want a warm dessert but have no energy to bake? I have those days all the time. After a long day of work and chores, the last thing I want to do is measure out flour, sugar, and salt. That is why I love dump cakes. They are the easiest thing you can make in your kitchen. You basically just throw things in a pan and let the oven do all the hard work for you.
In this post, you will learn how to make a peach dump cake that tastes like a fancy cobbler. I will show you the simple steps to get a golden crust and bubbly fruit every single time. It only takes a few minutes to get it ready for the oven. Your family will think you spent hours on it, but it can be our little secret that it was so simple. You do not even need a mixing bowl for this one!
Check out the recipe below to see how you can fix your sweet tooth tonight without any stress.
Everything You Need to Get Started
Before we start baking, let us talk about what makes a dump cake work. Most cakes need you to mix wet and dry things together until they are smooth. This cake is different. You layer the items and let the heat melt everything together. It sounds strange if you have never done it before. I remember the first time I tried it, I was sure it would stay a powdery mess. I was so wrong! It turned into a buttery, crispy topping that was better than many cakes I had made from scratch.
You only need a few basic things from the store. Most of these might already be in your pantry. Using canned fruit means you can make this any time of year. You do not have to wait for summer peaches to be in season. This makes it a great choice for a last-minute party or a cold winter night when you need a hug in a bowl. Let us look at what goes into the pan.
The Short List of Ingredients

To make this cake, you need three main items. First, grab two cans of sliced peaches. I like the ones in heavy syrup because it makes the cake extra sweet and saucy. If you want it less sweet, you can use peaches in juice. Second, you need one box of yellow cake mix. Any brand works fine. Third, you need a cup of melted butter. That is usually two sticks. I always use salted butter because the salt makes the sugar taste even better. IMO, salt is the secret to a good dessert.
You can also add a little bit of ground cinnamon if you want a warm spice flavor. Some people like to add chopped pecans or walnuts on top for a crunch. These are optional, but they add a nice touch. I usually keep it simple with just the three main things when I am in a big hurry. It still tastes amazing without the extras.
Picking the Right Pan

The best pan for this recipe is a 9×13 inch baking dish. I usually use a glass one so I can see the fruit bubbling on the sides. A metal pan works too, but it might cook a little faster. You want to make sure you grease the pan really well. I forgot to do this once, and the peaches stuck to the bottom like glue. It was a mess to clean up! Now I always use a good spray or a little extra butter to coat the sides and bottom.
If you have a smaller family, you can cut the recipe in half and use a square pan. However, this cake keeps well in the fridge, so I usually make the big one anyway. Leftovers are great for breakfast the next morning. It is basically like fruit and toast, right? That is what I tell myself when I am eating it with my coffee.
Recipe Quick Info
- Prep Time: 5 minutes
- Cook Time: 45 minutes
- Servings: 12 people
- Difficulty: Very Easy
How to Put the Cake Together
Now comes the fun part where we actually build the cake. The most important rule of a dump cake is that you do not stir it. This feels very wrong to a lot of people. Every fiber of your being will want to grab a spoon and mix the powder into the fruit. Do not do it! If you stir it, the texture will be heavy and weird. If you leave it alone, the butter and fruit juice soak into the cake mix to create a light, crumbly crust.
I once tried to help the process by stirring a small corner of the pan. That corner turned out like a thick paste while the rest of the cake was perfect. I learned my lesson that day. Just trust the process and let the oven do the magic. Here are the steps to follow for the best results.
Step by Step Instructions

- Preheat your oven to 350 degrees. This is very important so the cake starts cooking right away.
- Open your cans of peaches. Pour them into your greased 9×13 pan. Do not drain them! You need that syrup to moisten the cake mix.
- Spread the peaches out so they cover the whole bottom of the pan.
- Open the cake mix box. Sprinkle the dry powder evenly over the peaches. Try to cover all the fruit so no peaches are sticking out.
- Melt your butter in the microwave. Pour the melted butter slowly over the top of the cake mix. Try to get as much of the powder wet as you can.
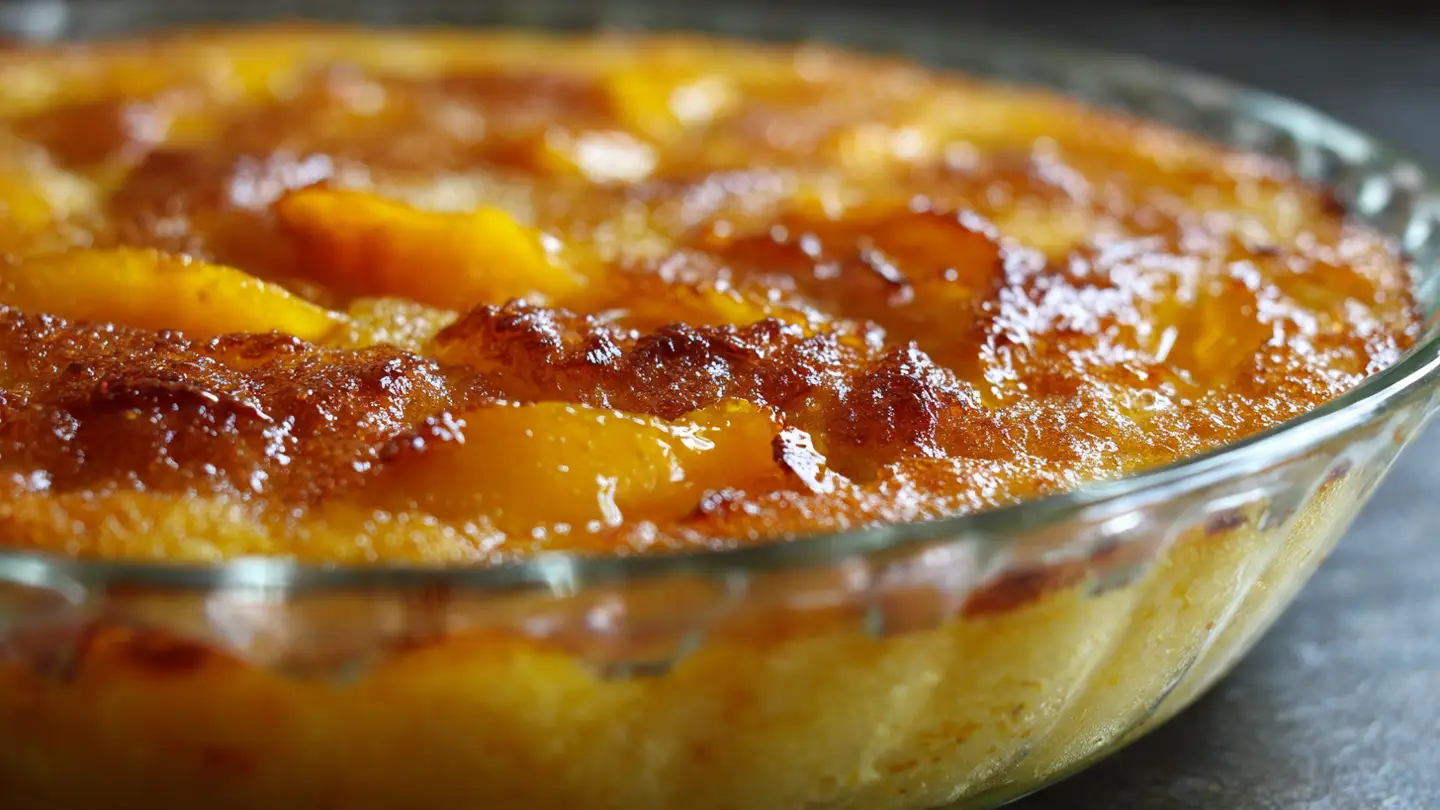
- Bake the cake for 45 to 50 minutes. You will know it is done when the top is golden brown and the fruit is bubbling up around the edges.
If you see any dry spots of flour after 30 minutes, you can carefully dab a little more melted butter on them. This helps make sure you do not have any dry bites. Once the timer goes off, let the cake sit for about 10 minutes before you serve it. This lets the sauce thicken up so it is not too runny.
Tips for the Best Crust

To get a really crunchy top, you can use cold butter instead of melted butter. I have tried both ways. When you use cold butter, you cut it into very thin slices and lay them in rows all over the top. It takes a little more time to slice the butter, but the crust gets very crispy. If you are in a rush, melting it and pouring it is much faster and still tastes great. Just make sure you cover the whole surface.
Another tip is to check the corners of your pan. The corners usually get the darkest. If you see the edges getting too brown before the middle is done, you can cover the edges with a little bit of foil. This keeps them from burning while the rest of the cake finishes. Most of the time, 45 minutes is the perfect sweet spot for my oven.
Variations You Can Try

One of the best things about this recipe is how easy it is to change. If you do not like peaches, you can use cherry pie filling or even canned pineapple. I often use one can of peaches and one can of crushed pineapple. This gives it a tropical taste that is really refreshing. You can also change the cake mix. A spice cake mix goes perfectly with peaches and makes it taste like a fall dessert. FYI, spice cake mix is my favorite way to level up this dish.
For a bit of crunch, I highly recommend adding a cup of chopped nuts on top of the cake mix before you add the butter. The butter toasts the nuts while the cake bakes. It adds a whole new layer of texture. If you are making this for kids, they usually prefer it plain, but adults love the extra crunch. You can also sprinkle a little brown sugar on top for a caramel flavor.
Expert Baking Tips
- Even Spreading: Use a fork to gently level the dry cake mix so there are no huge mounds.
- Butter Coverage: If you use melted butter, pour it in a zig-zag pattern to hit every area.
- Pan Prep: Always grease the corners of the pan extra well since that is where sugar sticks most.
How to Serve Your Cake

This cake is best served warm. When it comes out of the oven, the peaches are hot and the syrup is thin. It is basically a giant hug in a bowl. My favorite way to eat it is with a big scoop of vanilla ice cream. The cold ice cream melts into the warm cake and creates a delicious cream sauce. If you do not have ice cream, a big dollop of whipped cream is also amazing.
If you are serving this at a party, you can put the whole dish out with a large serving spoon. It is not a cake that you cut into neat squares. It is more like a cobbler that you scoop into bowls. It looks a bit messy, but that is part of the charm! It is rustic and homey. People will keep coming back for second helpings because it is so hard to stop eating once you start.
Storage and Reheating

If you have leftovers, do not throw them away! This cake stays good in the fridge for about 4 or 5 days. Just make sure you cover the pan with plastic wrap or move the cake to an airtight container. I actually think it tastes even better the next day because the flavors have more time to soak together. The crust will get a little softer in the fridge, but it still tastes great.
When you want to eat a leftover portion, just put it in a microwave-safe bowl. Heat it up for about 30 to 45 seconds. This brings back that bubbly texture and makes the butter taste fresh again. I would not recommend freezing this cake, as the peaches can get a bit mushy when they thaw out. It is so easy to make that it is better to just bake a fresh one when you want it again.
Answers to Your Common Questions
Can I use fresh peaches for this recipe?
Yes, but you need to add sugar and a little water or juice to make a syrup. Canned peaches are easier because the syrup is already there to moisten the cake mix.
What if I do not have a yellow cake mix?
A white cake mix or a butter pecan cake mix will also work great. Even a vanilla mix is fine. Just avoid chocolate as it does not go very well with peaches.
Why is my dump cake still powdery on top?
This happens if the butter did not touch some of the cake mix. Next time, try to spread the butter more evenly or use more butter to cover the dry spots.
Do I need to grease the baking dish?
Yes, you should always grease the pan. The sugar in the peach syrup can get very sticky and will be hard to wash off if you do not use spray or butter.
Can I make this in a slow cooker?
You can! Put the ingredients in the crockpot in the same order. Cook on high for 2 hours or low for 4 hours. The top will be less crispy than the oven version.
Time to Enjoy Your Sweet Treat
This peach dump cake is the ultimate solution for a busy night. It uses simple pantry items and takes almost no effort to put together. I hope you give it a try next time you need a quick dessert. You really cannot go wrong with warm peaches and a buttery crust. It is a classic for a reason. Happy baking!