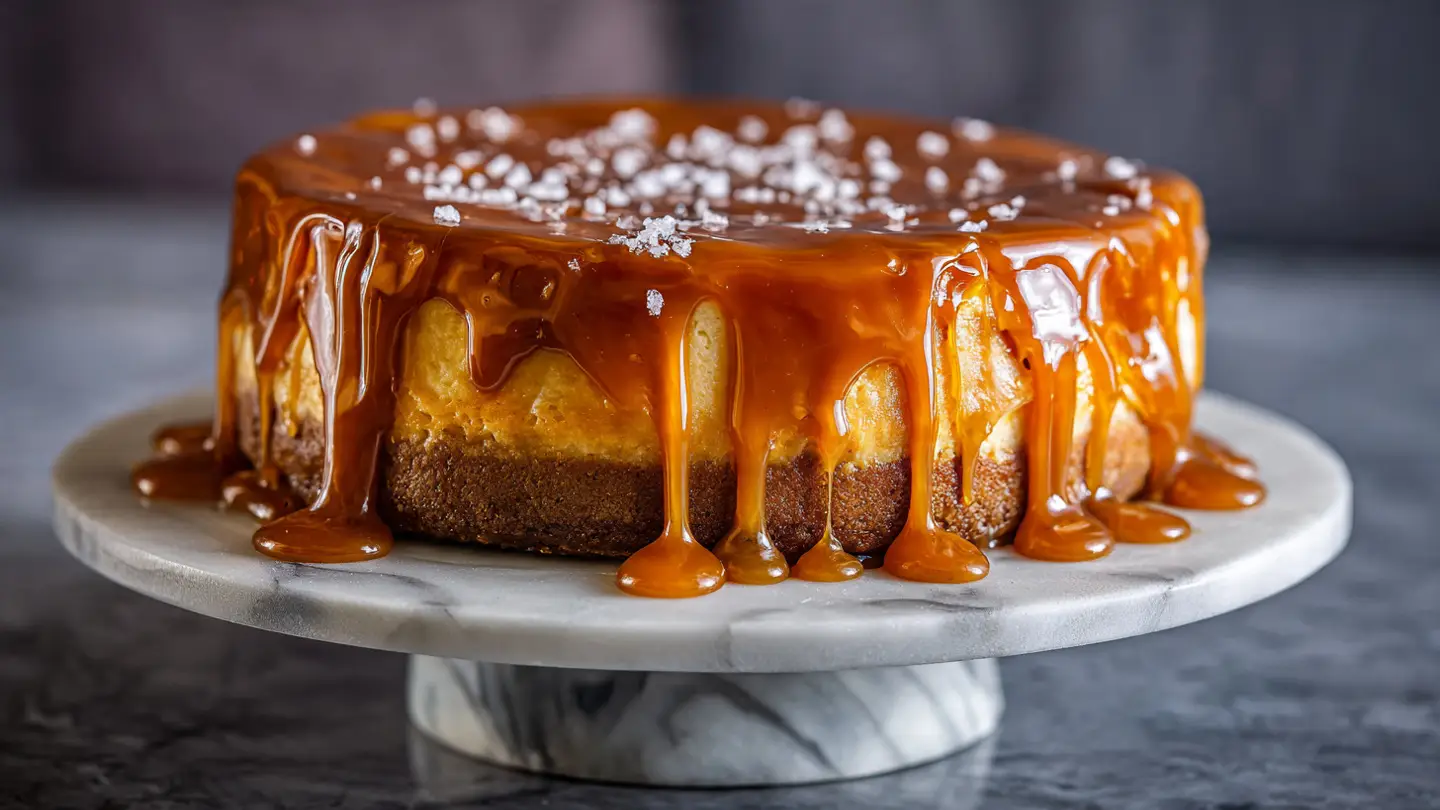
Gooey Salted Caramel Cheesecake
I love cheesecake more than any other dessert. It is thick, creamy, and sweet. But sometimes, a plain cheesecake can feel a bit boring. That is why I started making this salted caramel version. It has a salty kick that makes the sugar taste even better. The middle stays soft and gooey while the edges are firm. It is the kind of treat that makes everyone at the table go quiet because they are busy eating.
Making a cheesecake can seem scary to some people. I used to be afraid of the top cracking or the middle staying like soup. I have made many mistakes over the years. One time, I forgot to wrap my pan in foil and water got into my crust. It was a soggy mess! But I learned from those bad bakes. Now, I have a recipe that works every single time. It is simple enough for a kid to help with, but it looks like it came from a fancy shop.
In this post, I will teach you how to make the perfect crust and the smoothest filling. You will also learn how to make homemade caramel sauce without burning your pot. It takes a little bit of time, but the result is so good. You do not need to be a pro chef to get this right. Just follow my steps and stay patient. Let us get your kitchen smelling like sweet sugar and butter!
Grab your apron and let us start baking!
Recipe Quick Info
- Prep Time: 30 minutes
- Cook Time: 60 minutes
- Servings: 12 slices
- Difficulty: Medium
Gathering Your Baking Supplies
Before you turn on the oven, you need to check your cupboards. It is very annoying to start a recipe and find out you are out of eggs. I always lay everything out on my counter first. This helps me stay calm while I work. For this cake, you will need a special pan called a springform pan. This pan has a ring that pops off so the cake stays whole. If you use a normal round cake pan, you might never get the cheesecake out in one piece!
Most of these items are easy to find at any grocery store. You do not need expensive brands. Simple store brands work just fine for baking. Just make sure your ingredients are fresh. Old baking powder or stale cookies will make the cake taste funny. Quality matters most for the cream cheese. I always buy the full-fat kind because it makes the cake much creamier than the low-fat version. FYI, the texture is much better that way.
The Shopping List

To make the best gooey salted caramel cheesecake, you need a specific list of items. For the base, you need graham crackers or digestive biscuits. You also need melted butter and a little bit of sugar. This creates that crunchy bottom that holds everything together. I once tried using salted crackers for the crust, but it was a bit too weird. Stick to sweet crackers for this one! It provides the perfect balance to the rich filling.
- 2 cups of crushed graham crackers
- 6 tablespoons of melted butter
- 3 blocks of full-fat cream cheese (8 ounces each)
- 1 cup of white sugar
- 1 cup of sour cream
- 1 tablespoon of vanilla extract
- 3 large eggs
- 1 cup of homemade or store-bought caramel sauce
- 1 teaspoon of flaky sea salt
Why Room Temperature Matters

This is the biggest secret in cheesecake baking. Your cream cheese and eggs must be soft. If the cheese is cold, it will stay lumpy. No amount of mixing will get those lumps out later. I usually take my ingredients out of the fridge two hours before I start. If you are in a rush, you can put the eggs in warm water for ten minutes. Soft cheese blends into a silky smooth batter that looks like clouds. It makes the cake feel light and airy on your tongue.
When you mix cold cream cheese, you often over-mix it trying to break the lumps. Over-mixing adds too much air. Too much air causes the cake to puff up in the oven and then crash down. This leads to those big cracks on top that look like a map. By keeping things at room temperature, you keep the batter thick and stable. It is a small step that saves a lot of trouble later on. Trust me, I learned this the hard way after many lumpy cakes!
Building the Cheesecake Layers
A great cheesecake has layers of flavor. It starts with the crust, then the creamy middle, and finally the topping. You want to make sure each layer is handled with care. The crust needs to be packed down tight so it does not crumble when you cut a slice. I like to use the bottom of a flat measuring cup to press the crumbs into the pan. This makes it look very neat and professional. It also keeps the butter from leaking out too much during the bake.
The filling is where the magic happens. This is a “gooey” version, so we do not bake it until it is dry. We want a slight jiggle in the center when we pull it out. This jiggle tells us the cake will be soft and melt in your mouth. Don’t worry, the cake will firm up as it cools down in the fridge. If you bake it until it is totally solid, it will taste more like a brick than a dessert. No one wants a brick for a treat!
Making the Perfect Crust

Start by smashing your crackers into fine dust. You can use a blender or just put them in a plastic bag and hit them with a rolling pin. Mix the crumbs with the melted butter and a pinch of sugar. It should look like wet sand. Press this into your pan. I like to bring the crust about an inch up the sides of the pan. This creates a little wall that holds the caramel later. Bake the crust for just 8 minutes to set it. This keeps it from getting soggy once the liquid filling is added.
If you want to try something different, you can use chocolate cookies for the crust instead. The dark chocolate tastes amazing with the salted caramel. However, standard graham crackers are the classic choice for a reason. They have a honey flavor that everyone loves. Just make sure the butter is mixed in well. If you see dry spots of crumbs, the crust will fall apart when you try to serve it. This is a common mistake I made when I was first learning to bake.
Mixing the Gooey Filling

Now, beat the cream cheese and sugar until it looks like frosting. Add the sour cream and vanilla next. The sour cream adds a nice tang that cuts through the heavy sugar. Finally, add the eggs one at a time. This is important! Only mix until you cannot see the yellow of the egg anymore. If you keep mixing after that, you are adding air. Air is the enemy of a dense, gooey cheesecake. We want a smooth, heavy batter that pours slowly into the pan.
Once your batter is ready, pour half of it over your crust. Then, take some of your caramel sauce and drizzle it in circles. Use a knife to swirl the caramel around. Pour the rest of the batter on top. This creates a hidden caramel surprise in the middle of the cake. IMO, this is the best part of the whole recipe. Every bite has a little pocket of gooey gold. It makes the cake feel much more special than a regular plain cheesecake.
The Water Bath Trick

To keep the cake soft and prevent cracks, we use a water bath. This sounds fancy, but it is just a big pan of water. Wrap the outside of your cheesecake pan in three layers of heavy-duty foil. This stops water from getting into your crust. Place the pan inside a larger roasting tray. Fill the tray with hot water until it reaches halfway up the side of the cake pan. The steam from the water keeps the oven moist. This helps the cake cook evenly from the outside to the inside.
This may not work if you use thin, cheap foil. I have had water leak in because I used thin foil that ripped. Always check for holes! If you are really scared of water, you can put a pan of water on the rack below the cheesecake instead. It is not as good as a real water bath, but it helps a little bit. A real water bath is the best way to get that professional, flat top without any brown burnt spots or deep cracks. It is worth the extra few minutes of work.
Pro Baking Tips
- The Foil Shield: Use extra-wide foil so there are no seams at the bottom of the pan for water to enter.
- Cooling Slowly: When the timer goes off, crack the oven door and leave the cake inside for an hour. Rapid temperature changes cause cracks.
Finishing and Serving
Once the cake is done baking, the hardest part begins. You have to wait. If you try to eat a warm cheesecake, it will be like eating thick pudding. It needs time to set its structure. I always let mine cool on the counter first, then I put it in the fridge overnight. At least six hours is needed, but twelve is better. This long chill time is what creates that perfect cheesecake texture. It becomes firm enough to slice but stays creamy on the tongue.
When you are ready to serve, that is when we add the extra caramel. Salted caramel is great because it is not just sweet. The salt makes your mouth water and makes you want another bite. You can buy caramel in a jar, but making it yourself is very fun. You just melt sugar until it turns brown, then add butter and cream. Just be very careful! Hot sugar is like lava. I once got a tiny drop on my finger and it hurt for days. Safety first in the kitchen!
The Salted Caramel Topping

Take your chilled cake out of the fridge and remove the outer ring of the pan. Warm up your caramel sauce slightly so it is easy to pour. Pour a generous amount right in the middle and let it run toward the edges. You can use a spoon to help it drip down the sides for a cool look. Finally, sprinkle the flaky sea salt over the top. The big flakes look beautiful and give a nice crunch. Do not use regular table salt here! It is too fine and will just make the cake taste salty throughout instead of having bursts of flavor.
If you don’t like caramel, you can use chocolate ganache or even fruit. However, the caramel really fits the “gooey” theme of this recipe. You can even add some toasted pecans on top if you want a bit of a crunch. This cake is very rich, so you only need a small slice to be happy. It is the perfect end to a big dinner party or a holiday meal. Everyone will think you spent all day on it, but you know the secrets now.
How to Cut Perfect Slices

If you want your slices to look like they are from a magazine, use a hot knife. Run your knife under hot tap water for a few seconds. Wipe it dry with a towel. Make one clean cut into the cake. Wipe the knife clean, heat it again, and make the next cut. This prevents the sticky cheesecake from sticking to the knife and tearing the next slice. It takes a little more time, but the clean edges look amazing on a plate. It shows off those beautiful layers you worked so hard to create.
I suggest serving this cake cold. Some people like it at room temperature, but I think the flavor is sharper when it is chilled. You can also add a dollop of whipped cream on the side. The plain cream helps balance out the heavy sugar from the caramel. This is a very heavy dessert, so skip the ice cream! You won’t need it. One slice of this is plenty for most people. It is a true showstopper of a dessert that will have people asking for the recipe.
Storage and Make-Ahead Tips
- Fridge: Store in an airtight container for up to 5 days.
- Freezer: You can freeze the whole cake (without the topping) for up to 2 months. Thaw in the fridge overnight.
- Advance Prep: Always make this at least one day before you need to serve it. It tastes better on day two!
Frequently Asked Questions
Can I use a different type of cookie for the base?
Yes! You can use Oreos, Biscoff cookies, or even vanilla wafers. Just make sure to crush them into fine crumbs so the crust stays together properly.
What if my cheesecake cracks on top?
Don’t worry! A crack does not change the taste. Since we are covering the whole top with a thick layer of gooey caramel, no one will ever see the crack anyway.
How do I know when the cheesecake is done baking?
The edges should be set and look slightly puffed. The center (about 3 inches) should still jiggle like Jell-O when you gently shake the pan. It firms up as it cools.
Why did my crust get soggy?
This usually happens if water leaks through the foil during the water bath. Ensure you use heavy-duty foil and wrap it tightly around the bottom and sides.
Can I use low-fat cream cheese?
I do not recommend it. Low-fat cheese has more water and less fat, which makes the cheesecake grainy and less creamy. Full-fat cheese gives the best gooey texture.
Final Thoughts on This Sweet Treat
Making a gooey salted caramel cheesecake is a labor of love that pays off in every bite. By using room temperature ingredients and a careful water bath, you can create a restaurant-quality dessert at home. Remember to let it chill fully for the best texture! It is the perfect mix of salty and sweet that your friends and family will love. Now that you know my secrets, go give it a try and enjoy your amazing creation.