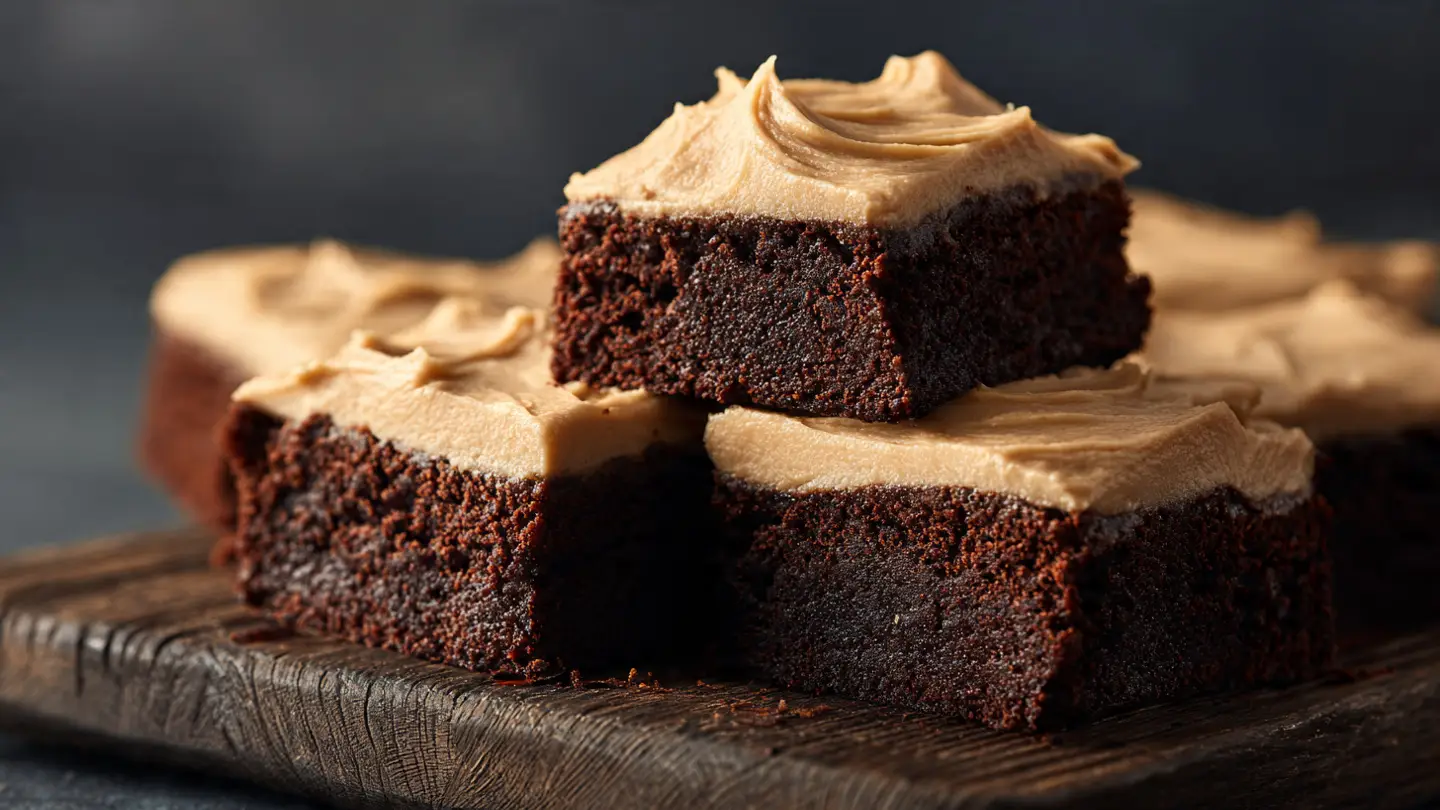
Frosted Coffee Brownies for Caffeine Lovers
Do you love the smell of fresh coffee in the morning? I know I do. It is the best way to wake up. But coffee is not just for mugs. It is a secret tool for baking. I found this out by accident one day. I ran out of milk for my brownie mix. I used cold coffee instead. The result was a deep, dark treat that tasted better than any box mix. It was a happy mistake that changed my kitchen forever.
Today, I want to show you how to make Frosted Coffee Brownies. These are not your average snack. They are thick, soft, and have a rich mocha flavor. We will use real coffee in the cake and in the frosting. You will learn how to mix the batter and make a smooth topping. These treats are perfect for parties or a quiet afternoon snack. If you like chocolate and coffee, this is for you.
Get your apron ready and clear some space on your counter. You can make these today with things already in your pantry.
The Ingredients You Need

To make these brownies, you need a few simple items. Most of them are likely in your kitchen right now. You will need butter, sugar, and eggs for the base. For the chocolate part, we use cocoa powder. I like to use dark cocoa for a stronger look. You also need flour and a pinch of salt. The salt is very important. It helps the chocolate taste even better. If you skip the salt, the brownies might taste too flat and sweet.
The most important part is the coffee. We use two types. We use brewed coffee for moisture and instant coffee for a punch of flavor. IMO, instant coffee is the best trick for bakers. It dissolves fast and adds a lot of taste without adding too much liquid. You will also need powdered sugar and a little more coffee for the frosting. Make sure your butter is soft before you start. Cold butter is hard to mix and can leave lumps in your batter. Use large eggs at room temperature so they blend well with the sugar.
Step by Step Baking Instructions

First, heat your oven to 350 degrees. Line an 8-inch square pan with parchment paper. This makes it easy to pull the brownies out later. In a large bowl, melt your butter. You can use a microwave or a stove. Add the sugar and stir it well. Next, add the eggs one by one. Whisk them until the mix looks shiny. This shine is what gives the brownies a thin, crackly top. I once forgot to whisk enough and the top stayed dull. It still tasted good, but it did not look as pretty.
Now, stir in the coffee. Use about two tablespoons of strong brewed coffee. After that, sift in your cocoa powder and flour. Sifting helps remove lumps. Fold the dry parts into the wet parts gently. Do not overmix! If you mix too much, the brownies will be tough like bread. You want them to stay soft and fudgy. Pour the batter into your pan and smooth the top. Bake for about 25 to 30 minutes. You know they are done when a toothpick comes out with just a few crumbs on it. Let them cool completely in the pan.
Making the Coffee Frosting

While the brownies cool, we make the frosting. This is the best part for caffeine lovers. Start with soft butter in a medium bowl. Beat the butter until it is pale and fluffy. Add two cups of powdered sugar. Mix it slowly so the sugar does not fly all over your kitchen. Once it looks crumbly, add your liquid. Use one tablespoon of hot water mixed with two teaspoons of instant coffee powder. This creates a strong coffee syrup that flavors the whole bowl.
Beat the frosting on high for a few minutes. It should turn a light tan color. If it is too thick, add a drop of milk. If it is too runny, add a little more sugar. I like my frosting thick so it stays in a tall layer on the brownie. Spread it over the cooled brownies using a flat knife or a spatula. Try to get it even from corner to corner. You can even use a fork to make little wavy lines on top. It looks fancy but takes no extra work. Put the pan in the fridge for ten minutes to let the frosting set.
Recipe Quick Info
- Prep Time: 15 minutes
- Cook Time: 25 minutes
- Servings: 16 squares
- Difficulty: Easy
Tips for the Best Results

I have learned a few things after making these many times. First, never frost a warm brownie. If the brownie is even a little bit hot, the butter in the frosting will melt. You will end up with a messy soup instead of a fluffy top. I made this mistake once when I was in a hurry for a party. I had to scrape it off and start over. It was a big waste of time! Be patient and wait for the pan to feel cold to the touch. It is worth the wait for a perfect slice.
Another tip is about the coffee. If you do not have instant coffee, you can use very strong espresso. Just be careful not to use too much liquid. The goal is to get the coffee taste without making the frosting watery. Also, try using a hot knife to cut the squares. Run your knife under hot water, dry it off, and then slice. This melts the frosting just enough to give you a clean edge. Wipe the knife after every single cut. This keeps the dark brownie crumbs from getting into the light brown frosting.
How to Store and Save Your Treats

These brownies stay fresh for a long time if you store them right. Put them in an airtight container. You can keep them on the counter for about two days. If your kitchen is warm, put them in the fridge instead. They actually taste amazing when they are cold. The frosting gets a little firm and feels like fudge. I often grab one right out of the fridge for a quick snack. They will last up to five days in the refrigerator.
Can you freeze them? Yes, you can! Wrap each square in plastic wrap and then put them in a freezer bag. They will stay good for two months. When you want one, just let it sit on the counter for thirty minutes. It will thaw out and taste just as fresh as the day you baked it. This is a great way to have a treat ready for guests. Just remember to wrap them well so they do not pick up smells from the freezer. Nobody wants a brownie that tastes like frozen peas!
Serving Ideas and Fun Toppings

You can serve these brownies just as they are, but toppings make them special. A simple dusting of cocoa powder looks very professional. I also like to grate a dark chocolate bar over the top. It adds a nice crunch to the soft frosting. If you want to be really fancy, place one whole roasted coffee bean in the center of each square. It tells people exactly what flavor to expect. It also looks like something you would buy at a high-end bakery downtown.
These are great with a glass of cold milk. The milk balances the strong coffee and chocolate. If it is a cold day, serve them next to a hot latte. It is a double dose of coffee that any fan will love. For a dessert plate, add a scoop of vanilla ice cream. The cold cream against the rich mocha brownie is a perfect match. You can even drizzle a little caramel sauce over the whole thing. It turns a simple brownie into a giant sundae. Have fun with it and use what you have in your pantry.
Common Questions About Coffee Brownies
Can I make these without caffeine?
Yes! Just use decaf coffee and decaf instant coffee. You get the same great flavor without the buzz. It works perfectly for kids or late night snacks.
What if I don’t have a square pan?
You can use a round cake pan or a small glass dish. Just watch the bake time. A different shape might cook faster or slower than the square pan.
Why are my brownies dry?
You might have baked them too long. Every oven is different. Next time, check them five minutes early. A few moist crumbs on the toothpick are good!
Can I use oil instead of butter?
You can use vegetable oil. The brownies will be extra moist but might lose that rich buttery taste. Use the same amount of oil as melted butter.
How do I get the coffee taste stronger?
Add an extra teaspoon of instant coffee to the batter. You can also use espresso powder which is very strong. It makes the chocolate taste even darker.
Enjoy Your Homemade Mocha Treats
Baking at home should be fun and easy. These coffee brownies prove that you do not need fancy tools to make something great. Just remember to use good coffee and wait for them to cool before frosting. You now have a perfect recipe to share with friends. Take a big bite and enjoy the rich chocolate and bold coffee flavors you made yourself!