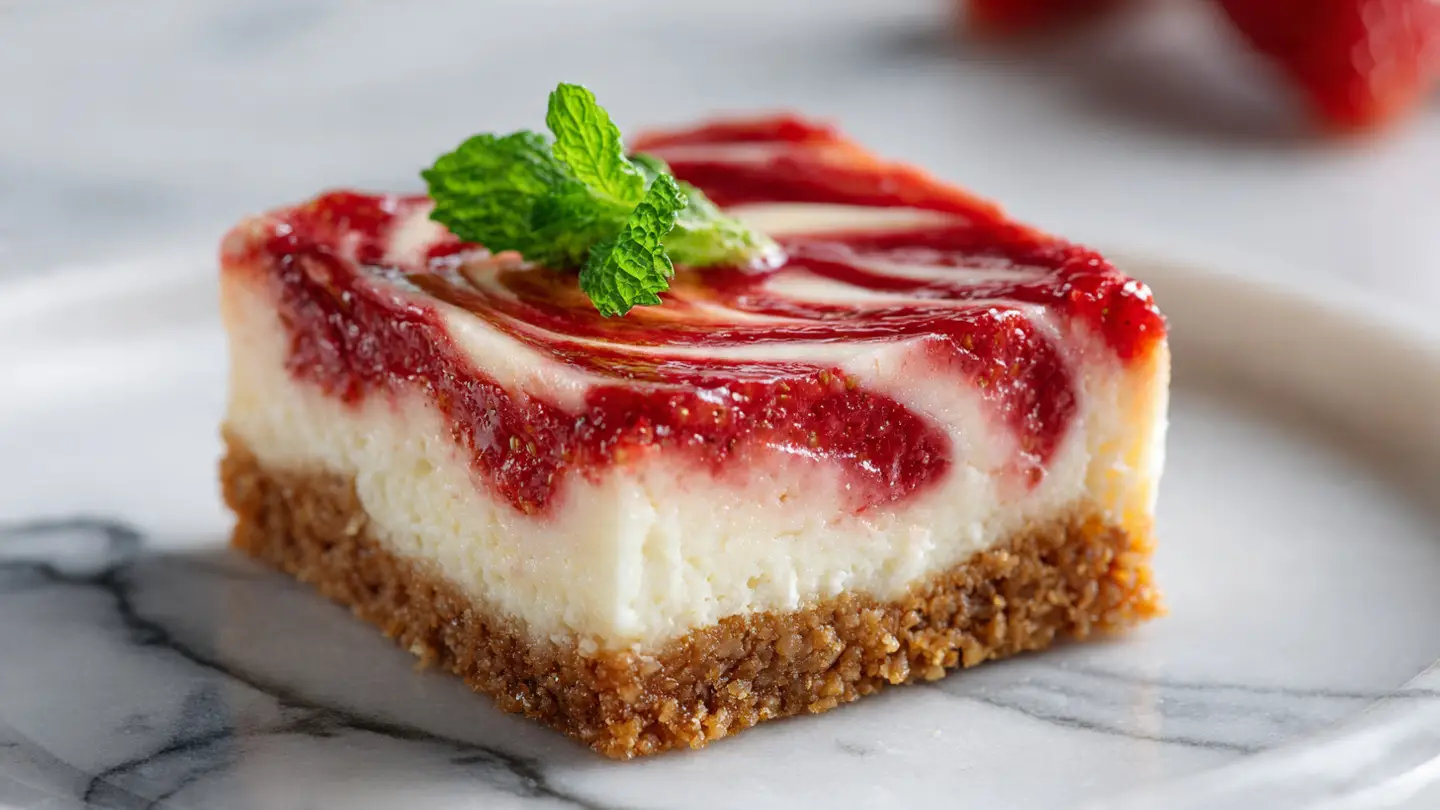
Strawberry Cheesecake Bars: Creamy and Fruity
Everyone loves a good dessert that tastes like summer. These strawberry cheesecake bars are the best treat for a sunny day or a family dinner. They have a crunchy bottom, a smooth middle, and a sweet fruit top. I make these all the time because they are much easier than a big round cheesecake. You do not need a special pan with a latch on the side. A simple square baking dish works just fine.
In this post, I will show you how to make these bars from start to finish. You will learn how to bake the crust so it stays crisp. I will tell you how to mix the filling so it is not lumpy. We will also talk about the best way to swirl the fruit on top. These bars are great for kids and grown-ups alike. They look fancy but feel like home cooking.
Try this recipe today to see how easy baking can be!
Getting Everything Ready for Your Kitchen
Baking is much more fun when you have all your stuff ready before you start. I like to clear off my big counter and get my bowls out. It makes the whole process faster. You do not want to be looking for a spoon while your butter is melting. These bars use simple things you can find at any store. Most of these items are probably in your pantry right now. I always check my eggs and cream cheese first to make sure they are fresh.
One thing to remember is that temperature matters a lot for cheesecake. Cold cheese will stay in little balls and won’t get smooth. I learned this the hard way once when I was in a rush. My bars had white dots everywhere because the cheese was too cold. Now, I always leave my ingredients on the counter for an hour before I start. This simple step makes a huge difference in how the dessert feels in your mouth.
The Ingredients You Need

First, let us talk about what goes into the shopping cart. You need graham crackers for the crust. You can buy the crumbs in a box or crush the crackers yourself. I think crushing them in a plastic bag is fun. You also need melted butter and a little bit of sugar for that base layer. The butter acts like glue to hold the crumbs together so they do not fall apart when you take a bite.
For the creamy part, you need two big blocks of cream cheese. Make sure it is the full-fat kind in the silver foil. Low-fat cheese can make the bars too runny. You also need white sugar, two eggs, and a splash of vanilla. The eggs help the cake set up firm. For the strawberry part, you need fresh berries, a little more sugar, and some lemon juice. The lemon makes the berry flavor pop and keeps it from being too sweet.
- 1.5 cups graham cracker crumbs
- 5 tablespoons melted butter
- 1/4 cup sugar (for crust)
- 16 ounces cream cheese (softened)
- 1/2 cup sugar (for filling)
- 2 large eggs
- 1 teaspoon vanilla extract
- 1 cup fresh strawberries (chopped)
- 1 tablespoon lemon juice
Step-By-Step Baking Guide

Now it is time to get cooking. Turn your oven to 350 degrees. Line a square pan with parchment paper. Leave some paper hanging over the sides like little handles. This makes it so easy to lift the bars out later. Mix your crumbs, melted butter, and sugar in a small bowl. Press them into the bottom of your pan. I use the bottom of a heavy glass to push the crumbs down flat. Bake this for 10 minutes then let it cool.
While the crust cools, beat your cream cheese and sugar in a big bowl. Use a hand mixer if you have one. Mix it until it looks like clouds. Add your eggs one at a time. Do not mix too much after the eggs go in, or the cake might crack. Pour this over your crust. Now, mash your strawberries with the lemon juice and a spoonful of sugar. Drop little dots of fruit on top of the white batter. Use a butter knife to swirl them around gently.
- Preheat oven to 350°F and line an 8×8 inch pan.
- Mix crumbs, butter, and 1/4 cup sugar; press into pan.
- Bake crust for 10 minutes and cool slightly.
- Beat cream cheese and 1/2 cup sugar until smooth.
- Add eggs and vanilla; mix on low speed.
- Pour batter over crust.
- Mash berries with lemon and extra sugar.
- Drop berry mix onto batter and swirl with a knife.
- Bake for 30-35 minutes until the edges are set.
- Cool at room temp, then chill in the fridge for 3 hours.
Tips for the Best Results

Baking can be tricky, but I have some secrets to help you. One big tip is to use a water bath if you are worried about cracks. You can place a pan of water on the rack below your cheesecake. This keeps the air moist. But honestly, for bars, cracks do not matter much because the strawberry swirl hides them! Another tip is to always scrape the sides of your bowl. Sometimes big chunks of cheese hide at the bottom. If you don’t scrape, those chunks will end up in your bars.
If you want to try something different, you can change the fruit. IMO, raspberries work just as well as strawberries. You can even use blueberries if you like that better. Just make sure to cook the fruit down a little bit if it is very watery. If you use frozen berries, thaw them and drain the extra juice first. Too much water will make the top of your cheesecake mushy. I learned that when I tried using frozen cherries once without draining them.
Recipe Quick Info
- Prep Time: 20 minutes
- Cook Time: 35 minutes
- Servings: 12 bars
- Difficulty: Easy
How to Serve These Treats

Once the bars are cold, it is time to cut them. This is the most rewarding part! Lift the whole block out of the pan using the parchment paper handles. Use a sharp knife to make clean cuts. I like to wipe my knife with a warm towel between every single cut. This keeps the edges of the bars looking sharp and pretty. If you don’t wipe the knife, the strawberry red gets smeared all over the white sides.
You can serve these just as they are, or you can add a little extra. A dollop of whipped cream on top looks very nice. Some people like to sprinkle extra graham cracker crumbs over the fruit. These are great for parties because people can just grab one with their hands. They are much less messy than a slice of cake. FYI, these taste even better the second day because the flavors have time to mix together.
Storage and Saving for Later

If you have leftovers, you need to keep them cold. Cheesecake has a lot of dairy, so it cannot sit on the counter for a long time. Put them in a container with a tight lid. I put a piece of wax paper between the layers so they do not stick. They will stay fresh in the fridge for about five days. I think they are a perfect snack for a midnight treat. Just grab one and go!
You can also freeze these bars if you want to keep them longer. Wrap each bar in plastic wrap and then put them in a big freezer bag. They can stay in the freezer for two months. When you want to eat one, just let it sit on the counter for about 20 minutes. It will taste just like it was freshly baked. This is a great way to have a treat ready whenever a friend stops by unexpectedly.
Freshness Tips
- Cold Storage: Always keep bars in the fridge.
- Freezing: Wrap tightly to prevent freezer burn.
- Cutting: Cut while cold for the cleanest squares.
Common Mistakes to Avoid

The biggest mistake people make is taking the bars out too early. The middle should wiggle just a little bit when you shake the pan. If it looks like liquid, it needs more time. If it is totally still, it might be overcooked. Overcooked cheesecake can get a grainy texture that feels like sand. It is better to turn off the oven when the edges are puffy but the center is still a bit soft. The heat from the pan will finish the job.
Another mistake is using the wrong kind of butter. Do not use margarine or tub butter. They have too much water in them. Real sticks of butter are the only way to get a crust that stays together. Also, make sure you don’t skip the chilling time. I know it is hard to wait when the house smells like cookies and berries. But if you cut them while they are warm, they will just fall apart into a big puddle. Patience is the secret ingredient here!
Why You Will Love This Recipe
I really think these are the best bars because they are so flexible. You can make them for a fancy wedding shower or a simple backyard lunch. They are not too heavy, but they satisfy that craving for something sweet. The red swirls make them look like you spent hours in the kitchen, but the prep only takes a few minutes. It is a win for everyone. Plus, using fresh berries makes it feel a little bit healthy, even if there is plenty of sugar in there!
When I first started baking, I was scared of cheesecake. I thought it was only for professional chefs. But after making these bars, I realized it is just about following simple steps. You do not need to be an expert to make something that tastes amazing. Just remember to keep your ingredients at room temperature and give the bars time to cool down. If you do those two things, you will have perfect results every single time.
Your Questions Answered
Can I use frozen strawberries?
Yes, you can use frozen berries. Thaw them first and pat them dry with a paper towel. This keeps the cheesecake from getting too watery on top.
How do I know when the bars are done?
The edges will be slightly brown and puffy. The middle should still have a small jiggle like gelatin. It will firm up completely as it cools in the fridge.
Why did my cheesecake crack?
Cracks usually happen if the oven is too hot or if you mixed the eggs too much. Mixing fast adds air that expands and then pops during baking.
Do I have to use parchment paper?
It is very helpful for lifting the bars out. If you do not have it, grease the pan very well with butter. The bars might be a little harder to remove cleanly.
Can I make the crust with other cookies?
Sure! Vanilla wafers or even chocolate sandwich cookies work great. Just keep the amount of crumbs and butter the same for the best base.
Happy Baking!
These strawberry cheesecake bars are a classic for a reason. They bring together a crunch, a cream, and a fruit punch in every bite. I hope you enjoy making these as much as I do. They are a true crowd-pleaser that never lasts long on the plate!