Easy Turtle Bars with Pecans and Caramel
I love snacks that taste like they took all day to make but only took a few minutes. These Easy Turtle Bars are exactly that kind of treat. They have a buttery crust, a soft caramel center, and a layer of salty pecans and chocolate on top. I first made these for a school bake sale and they sold out in less than ten minutes. People kept asking me for the recipe and I felt like a pro baker even though the steps are very simple. You get the perfect mix of sweet and salty in every single bite.
If you have never made bar cookies before, this is the best place to start. You do not need any fancy tools or a lot of skill. All you need is a big bowl, a baking pan, and an appetite for something delicious. I will show you exactly how to mix the dough, melt the caramel, and get that perfect chocolate drizzle. By the end of this guide, you will be able to make a tray of these amazing treats for your family and friends. Let us get into the kitchen and start baking something special together.
Get your apron on and clear off your counter because these bars are about to become your new favorite dessert.
Setting Up Your Kitchen for Success
Before you start mixing things, you need to have a good plan. I used to just jump in and start cooking without reading the whole recipe first. That was a big mistake because I would realize halfway through that I was missing an egg or the butter was too cold. Now I always get my ingredients out on the table first. This makes the whole process much faster and keeps the kitchen from getting too messy. Making turtle bars is easy but it helps to have your oven ready and your pan lined with paper so nothing sticks.
You should also make sure your pecans are fresh. Sometimes nuts can sit in the pantry for a long time and lose their crunch. Give one a taste before you start. If it tastes like wood or feels soft, go buy a new bag. Fresh nuts make a huge difference in how these bars turn out. I also like to use good quality chocolate chips. Cheap ones sometimes have a weird waxy feel when they melt. You want the good stuff so the top of your bars looks shiny and tastes like real cocoa.
What You Will Need

The list for these bars is pretty short. You probably have most of these things in your pantry right now. You will need all-purpose flour for the base. This gives the bars a solid structure so they do not fall apart when you pick them up. You also need brown sugar. I prefer light brown sugar because it has a nice molasses taste that matches the caramel. For the fat, we use unsalted butter. It needs to be soft but not melted like soup. If you use salted butter, just leave out the extra pinch of salt later on.
For the filling and topping, you need pecans and caramel. You can buy a bag of pecan halves or pieces. I think halves look prettier, but pieces are easier to eat. For the caramel, you can use the little squares that come in wrappers or a thick caramel sauce from a jar. Just make sure it is the thick kind meant for baking and not the thin kind for ice cream. Finally, you need semi-sweet chocolate chips. These balance out the sweetness of the caramel so the bars are not too sugary. FYI, milk chocolate works too if you really love sweet things.
Preparing the Baking Pan

One lesson I learned the hard way is that caramel is very sticky. If you put it right against the metal pan, you might never get it out. I once had to throw away a whole pan because I could not scrub the burnt sugar off. That is why I always use parchment paper now. You want to cut a piece of paper that fits the bottom and goes up the sides. You can even use two pieces to make a cross shape. This creates little handles so you can lift the whole block of bars out once they are cool.
If you do not have parchment paper, you can use aluminum foil. Just make sure to spray the foil with a little bit of non-stick cooking spray. This step is the secret to getting perfect squares that do not crumble. It also makes cleaning up a breeze. You just toss the paper in the trash and give the pan a quick rinse. IMO, parchment paper is the best invention for bakers ever. It saves so much time and frustration.
Recipe Quick Info
- Prep Time: 20 minutes
- Cook Time: 25 minutes
- Servings: 16 bars
- Difficulty: Easy
Making the Perfect Shortbread Crust
The crust is the foundation of your turtle bars. It needs to be strong enough to hold the heavy caramel and pecans but soft enough to bite through easily. We are making a basic shortbread crust. It is buttery and crumbly and tastes like a cookie. I like to use a fork or a pastry blender to mix the butter into the flour. You want it to look like coarse sand or little peas. If you mix it too much, the crust will be tough. If you mix it too little, it will just be a pile of flour. Finding that middle ground is key.
Once the dough is ready, you press it into the bottom of your pan. Use your fingers or the bottom of a flat measuring cup to get it even. You want a flat layer so every bar has the same amount of crust. We bake this part first before adding anything else. This is called blind baking. It ensures the crust stays crispy and does not get soggy when the wet caramel goes on top. Your kitchen will start to smell like a bakery while this is in the oven. It is a very cozy feeling.
Mixing the Dough Ingredients

Start by putting your flour and brown sugar in a large bowl. Whisk them together so there are no lumps of sugar. Then, add your softened butter. I usually cut the butter into small cubes first. This makes it much easier to mix in. Take your fork and start pressing the butter into the flour. It might feel like it is not doing anything at first, but keep going. Eventually, the flour will start to look damp and start sticking together in small clumps.
If your butter is too cold, this part will be hard on your wrists. If it is too warm, it will turn into a greasy paste. Try to leave your butter on the counter for about an hour before you start. You know it is ready when you can press your thumb into it and leave a mark without it squishing all the way through. This is a very simple dough, but it is the base for so many great desserts. I sometimes add a tiny splash of vanilla extract here for extra flavor, but it is not required.
Baking the Bottom Layer

Put your pan in the oven and set a timer. You are looking for the edges to turn a very light golden brown. It usually takes about 12 to 15 minutes depending on your oven. Do not let it get dark brown or it will taste burnt later. Remember, this crust is going back in the oven with the toppings later, so we just want it to be set. While it bakes, you can start getting the caramel and pecans ready. This saves time so you can put the toppings on while the crust is still warm.
One tip most blogs skip is to prick the dough with a fork before baking. This lets the air out so the crust does not bubble up. If you see a big bubble in the middle of your crust when you open the oven, just gently press it down with a spoon. It is not a big deal, but a flat crust makes the layers look much better. Once it is done, take it out and let it sit on a wire rack for just a minute. You want it to stay warm so the caramel spreads easily across the surface.
Adding the Gooey Layers
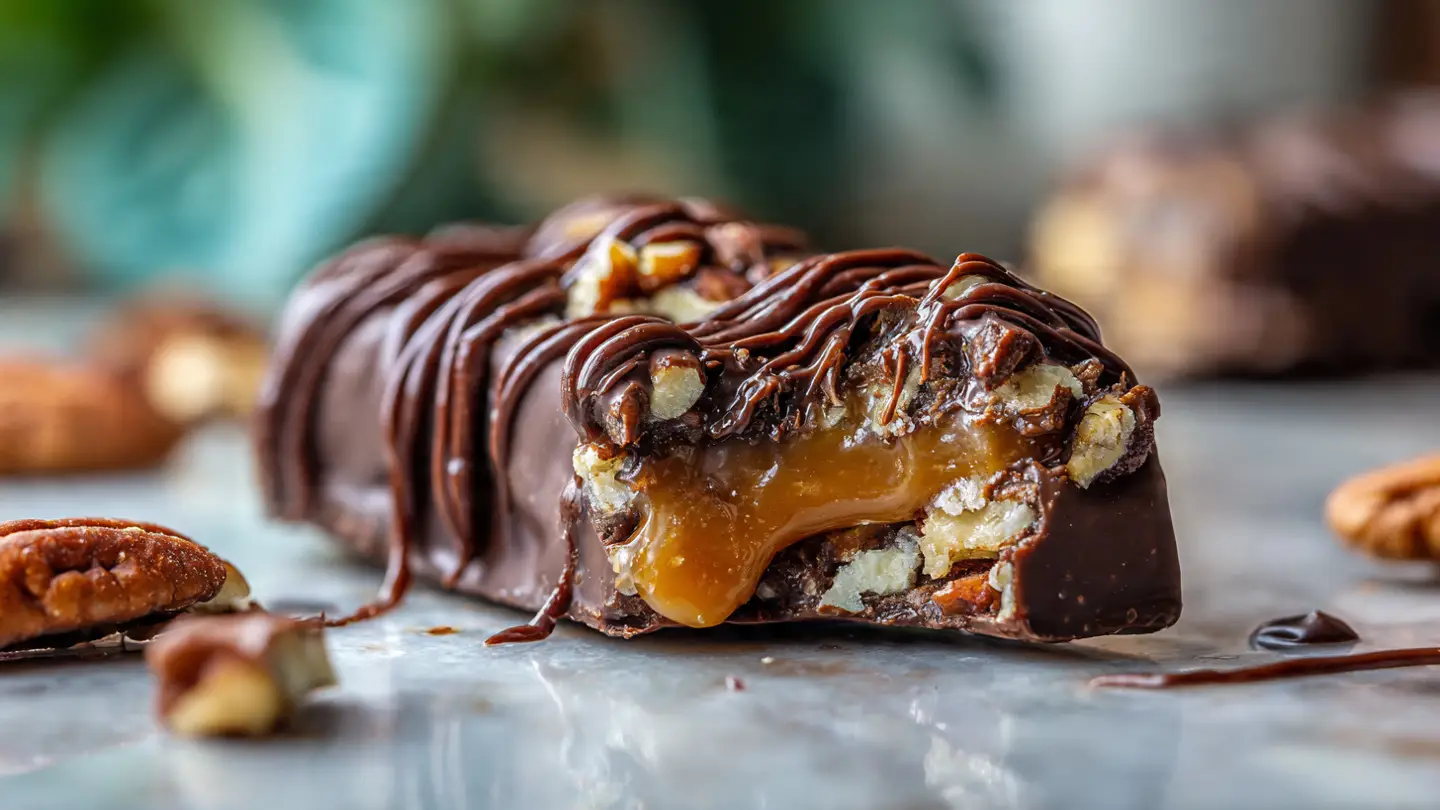
Now comes the best part of the whole process. We get to add the caramel and the pecans. This is what turns a plain cookie into a “turtle” bar. The name comes from the way the chocolate and pecans look like a little turtle shell. These layers are what give the dessert its famous texture. You have the crunch of the nut and the pull of the caramel. It is a very satisfying combination. I always feel like a candy maker during this step. It is fun to watch the caramel melt and bubble over the crust.
You can be generous with the pecans. I like to cover every single inch of the crust so every bite has a crunch. If you have someone in your family who does not like nuts, you can leave them off one side of the pan. That is the beauty of making things at home. You can change it to fit what you like. Just make sure you use enough caramel to hold everything together. The caramel acts like the glue for the whole dessert.
How to Melt the Caramel

If you are using wrapped caramel candies, you will need to melt them with a little bit of heavy cream or milk. Put them in a small pot over low heat. Do not rush this part! If you turn the heat up too high, the sugar will burn and it will smell terrible. Stir it constantly until it is smooth and shiny. It should look like liquid gold. If it feels too thick to pour, add one more teaspoon of milk. It should be easy to drizzle but not so thin that it runs like water.
If you are using a store-bought jar of caramel, make sure it is the thick “baking” kind. Some caramel sauces are meant for ice cream and they stay soft even when cold. Those will make a huge mess. You want a caramel that sets up firm. A quick test is to put a drop on a cold plate. If it stays in a ball and doesn’t run, it is perfect for your bars. This is the part where you have to resist the urge to eat it with a spoon because it is very hot.
Spreading the Pecans and Caramel

Spread your pecans over the warm crust first. Try to make an even layer. Then, pour your hot caramel over the top of the nuts. I like to start in the middle and work my way out to the edges. Use a spatula to push the caramel into the corners. Make sure the nuts are mostly covered. This helps them stay in place when you cut the bars later. It also ensures that the caramel gets down into the crust a little bit, which makes the whole thing taste better.
One limitation of this recipe is that it can be very messy if the caramel is too hot. If you find the caramel is running under the crust, don’t worry. It will still taste good! Just try to keep it on top as much as possible. This is the stage where the bars really start to look like the ones you buy at a fancy bakery. The contrast between the dark nuts and the light caramel is beautiful. Wait a few minutes before the next step so the caramel can set just a tiny bit.
The Chocolate Finish

While the caramel is still hot, sprinkle your chocolate chips over the top. Let them sit for about two minutes. The heat from the caramel and the crust will start to melt the chocolate. Once they look shiny and soft, take a knife or a spatula and gently spread the chocolate. You can cover the whole top or just make swirls. I like to leave some of the pecans and caramel showing because it looks more rustic and tasty that way.
If the chips are not melting, you can pop the pan back into the oven for 30 seconds. Just be careful not to leave them in too long or the chocolate will lose its shine. Once the chocolate is spread, you can add a tiny sprinkle of sea salt on top. This is a pro tip that makes the chocolate taste even richer. The salt cuts through the sugar and makes the bars taste more grown-up. Now comes the hardest part of the whole recipe: waiting for them to cool down.
Success Tips for Perfect Bars
- Cooling: Let the bars cool for at least two hours before cutting.
- Clean Cuts: Use a hot knife to get perfectly straight edges.
- Storage: Keep these in a sealed box so they don’t get hard.
Instructions for the Best Results

- Preheat your oven to 350 degrees and line an 8×8 inch pan with parchment paper.
- Mix 2 cups of flour, 1/2 cup of brown sugar, and 3/4 cup of softened butter until crumbly.
- Press the dough into the pan and bake for 12 to 15 minutes until light brown.
- While the crust bakes, melt 1 cup of caramel with 2 tablespoons of cream over low heat.
- Spread 1.5 cups of pecans over the warm crust.
- Pour the caramel over the pecans and bake for another 10 minutes until bubbly.
- Remove from the oven and sprinkle 1 cup of chocolate chips over the top.
- Wait 2 minutes, then spread the melted chocolate with a knife.
- Let the bars cool completely at room temperature before lifting them out of the pan and slicing into 16 squares.
Serving and Storage Suggestions
Once your bars are cool and cut, it is time to enjoy them. These are very rich, so a small square goes a long way. They are great for parties because you can make them a day ahead. In fact, I think they taste even better the next day after the flavors have had time to settle together. You can serve them on a big platter or wrap them individually in plastic wrap for lunch boxes. They are sturdy enough to travel, so they are perfect for picnics or potlucks too.
If you want to be extra fancy, you can serve a warm bar with a scoop of vanilla ice cream. The cold ice cream and the chewy caramel are a match made in heaven. My kids love to eat them with a big glass of cold milk. However you serve them, make sure you have some napkins nearby. The caramel can get a little bit sticky, especially if it is a warm day. These bars are a classic for a reason, and once you try them, you will see why everyone loves them so much.
How to Store Your Leftovers

If you have any bars left over, you need to store them correctly so they stay fresh. Keep them in an airtight container at room temperature. They will stay good for about 5 to 7 days. If your kitchen is very hot, the chocolate might get soft. In that case, you can keep them in the fridge. Just remember that cold caramel can be quite hard on your teeth. If you store them in the fridge, let them sit on the counter for 15 minutes before you eat them so they soften up.
You can also freeze these bars! Wrap them tightly in plastic wrap and then put them in a freezer bag. They will last for up to 3 months. This is great for when you want a quick treat but don’t want to bake a whole batch. Just pull one out and let it thaw. I sometimes eat them straight from the freezer because I like the extra chewiness, but be careful! They are like little bricks when they are frozen solid. Always label your bag with the date so you know how fresh they are.
Fun Variations to Try

Once you master the basic recipe, you can start having some fun with it. Instead of pecans, try using walnuts or even salted peanuts. Peanuts make it taste a bit like a famous candy bar. You can also change the chocolate. White chocolate or dark chocolate both work great. If you use dark chocolate, the bars will be less sweet and have a deeper flavor. I have even tried adding a layer of shredded coconut on top of the caramel for a tropical twist.
Another fun idea is to add some dried fruit. A few dried cranberries mixed with the pecans adds a nice tart flavor that cuts through the sugar. Or, you could add a sprinkle of colorful sprinkles on top of the chocolate to make them look festive for a birthday party. There are so many ways to make this recipe your own. Don’t be afraid to experiment in the kitchen. That is how the best recipes are discovered! Just keep the basic ratios of crust and caramel the same so the bars still hold their shape.
Your Questions Answered
Can I use store-bought cookie dough for the crust?
Yes! You can use sugar cookie dough. Just press it flat and bake it until it is firm before adding the toppings. It will be a bit sweeter than shortbread.
Why is my caramel too hard to bite?
This usually happens if the caramel was cooked too long or at too high a heat. Next time, add a little more cream and keep the heat very low while melting.
Can I make these bars gluten-free?
Sure! Use a 1-to-1 gluten-free flour blend for the crust. The caramel and pecans are naturally gluten-free, so just check your chocolate chip labels.
What if I don’t have a square pan?
A round cake pan or a small rectangular dish will work. The bars might be a different shape, but they will taste exactly the same. Just watch the bake time.
Do I have to use pecans?
No, you can use any nut you like. Walnuts, almonds, or even macadamia nuts work well. If you have a nut allergy, try using toasted oats or pretzels!
Time to Enjoy Your Treats
You now have all the steps to make amazing turtle bars. These treats are the perfect mix of crunchy, chewy, and sweet. They are easy to make and even easier to eat. Go share them with someone you love and enjoy every single bite!