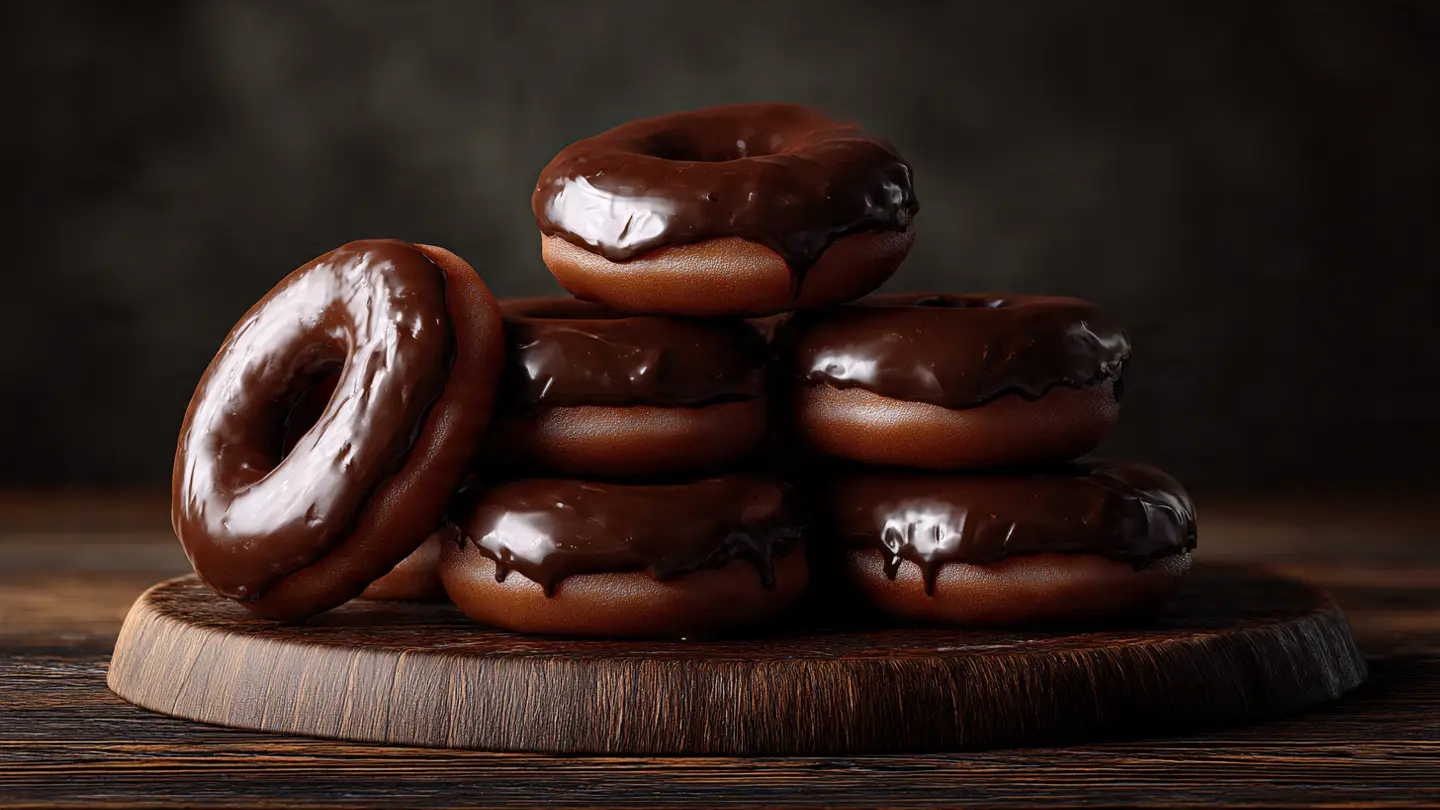
Rich Chocolate Donuts with a Silky Glaze
Making food at home is one of my favorite things to do. There is nothing like the smell of fresh bread or cakes filling up the house. Today, I want to share a recipe that makes everyone smile. We are making rich chocolate donuts with a very smooth and shiny glaze. These are not fried in hot oil, so they are much easier to handle. You just need a donut pan and a few simple items from your pantry.
I have tried many donut recipes over the years. Some were too dry, and some were way too sweet. I finally found the best way to make them soft and moist like a brownie. This recipe is great for kids and adults. You can make these for a birthday or just a fun Saturday morning. By the time you finish reading, you will know exactly how to mix the batter and get that glaze just right.
Do you want to see how easy it is to bake your own treats? Let us get started on these tasty circles of joy!
Check out my steps below to master the art of the chocolate donut!
Getting Ready for Baking Success
Before we turn on the oven, we need to make sure we have everything. I used to jump right into cooking without checking my cupboards. One time, I got halfway through a cake and realized I had no eggs! It was a big mess and I felt silly. Now, I always lay everything out on the counter first. This helps me stay calm and keeps the kitchen clean. If you have kids, they can help you gather the ingredients too.
Using the right tools makes a big difference. For this recipe, you really need a donut pan. It is a special metal tray with humps in the middle of each hole. This gives the donut its classic shape with a hole in the center. If you do not have one, you can use a muffin tin, but they will look like little cakes instead of donuts. Both ways taste great, but the donut shape is more fun to eat. Make sure your oven is ready by heating it up early so it is nice and hot when the batter goes in.
What You Need to Gather

You do not need anything fancy for these donuts. Most of these items are likely in your kitchen right now. I like to use dark cocoa powder because it makes the donuts look very chocolatey. You will also need all-purpose flour, which is the standard flour most people use for cookies. Sugar is a must for sweetness, and we use baking powder to help the donuts rise and become fluffy. If you forget the baking powder, your donuts will be flat and hard, which is no fun for anyone.
For the wet parts, you need milk, an egg, and some melted butter. I prefer butter over oil because it adds a better flavor. You also need a little bit of vanilla. Vanilla acts like salt in savory food; it makes all the other flavors taste stronger. Don’t forget a tiny pinch of salt! It helps balance the sugar so the donuts are not just sweet, but have a deep flavor. IMO, a good chocolate treat always needs that tiny bit of salt to be perfect.
- 1 cup all-purpose flour
- 1/3 cup cocoa powder
- 1/2 cup sugar
- 1 teaspoon baking powder
- 1/2 teaspoon salt
- 1/2 cup milk
- 1 egg
- 2 tablespoons melted butter
- 1 teaspoon vanilla
Setting Up Your Kitchen Space

Preparing your pans is a step you should never skip. I learned this the hard way when my first batch of donuts got stuck. I had to dig them out with a spoon, and they looked like brown crumbs instead of pretty rings. Now, I always use a little bit of butter or a spray to grease the inside of the donut holes. Even if your pan says it is non-stick, a little extra help ensures they slide right out. This saves you a lot of sadness later when it is time to eat.
Clear some space on your counter so you have room to move. You will need one big bowl for the dry stuff and a smaller bowl for the wet stuff. Having a wire rack ready is also a good idea. This is where the donuts will sit to cool down. If they stay in the hot pan too long, they keep cooking and can get dry. We want them to stay soft and moist. Taking these small steps before you start mixing makes the whole process feel like a breeze.
Recipe Quick Info
- Prep Time: 15 minutes
- Cook Time: 10 minutes
- Servings: 6 donuts
- Difficulty: Easy
Mixing and Baking the Perfect Donut
Now comes the fun part where we mix everything together. Baking is like a science project that you get to eat. You have to be careful with how much you mix the batter. If you stir it too much, the flour develops something called gluten. While gluten is great for chewy bread, it makes donuts tough and rubbery. We want our donuts to be light and tender. Just stir until you don’t see any more white flour streaks, and then stop right away.
The batter will be quite thick, which is normal. It should look a bit like thick chocolate pudding. Because it is thick, it can be hard to pour it into the skinny donut holes. I have a trick for this that makes it much cleaner. Instead of using a spoon, use a plastic bag with the corner cut off. This acts like a pipe to squeeze the batter exactly where you want it. It keeps the edges of the pan clean and makes sure each donut is the same size. Consistency is key when you want them all to bake at the same speed.
Combining Your Ingredients

First, take your big bowl and put in the flour, cocoa powder, sugar, baking powder, and salt. Use a whisk to stir them together. This breaks up any lumps in the cocoa powder. Cocoa powder loves to clump together, and nobody wants to bite into a ball of dry bitter powder. Once it looks like a light brown mix, move to your smaller bowl. Whisk the egg, milk, melted butter, and vanilla until they are well combined. It should look like a pale yellow liquid.
Pour the wet liquid into the dry brown mix. Use a spoon or a spatula to fold them together. Remember what I said about over-mixing! Just go slow and be gentle. As the milk hits the cocoa, the color will turn into a beautiful deep brown. It will smell amazing already, like a chocolate bar. This part is very satisfying to watch. If the batter feels way too thick to stir, you can add one extra teaspoon of milk, but usually, the measurements work out just right.
Filling the Donut Pan

As I mentioned, using a bag is the best way to do this. Take a large zip-top bag and put it inside a tall glass. Fold the edges of the bag over the rim of the glass. This makes it easy to pour the batter in without making a mess. Once the bag is full, seal it and snip off one bottom corner with scissors. Squeeze the batter into the greased donut pan. You only want to fill each hole about half-way or two-thirds full. If you fill them to the top, they will overflow and the hole in the middle will disappear!
If you don’t have a bag, you can use two small spoons. Use one spoon to scoop and the other to push the batter into the pan. It takes a bit longer, but it works fine. After filling the holes, give the pan a gentle tap on the counter. This helps settle the batter and gets rid of any large air bubbles trapped inside. Air bubbles can leave big holes in your finished donuts. We want them to be solid and soft all the way through. Now they are ready for the heat!
Baking to Perfection

Put your pan in the middle of the oven. These bake very fast, usually in about 8 to 10 minutes. Since they are dark chocolate, you cannot tell they are done by looking at the color. In vanilla cakes, you look for a golden brown edge, but here everything stays dark. To check if they are ready, gently press the top of a donut with your finger. If it springs back up, it is done. If your finger leaves a dent, it needs another minute or two. This is the best way to tell without cutting one open.
When they are done, take the pan out and let it sit for about five minutes. This lets the donuts firm up so they don’t break when you move them. After five minutes, turn the pan upside down over a wire rack. They should pop right out. If they don’t, you can use a butter knife to gently loosen the edges. Let them cool completely before you even think about the glaze. If the donuts are hot, the glaze will just melt and run off like water. Patience is the hardest part of baking, but it is worth it!
Pro Baking Tip
- Temperature Check: Make sure your egg and milk are at room temperature. This helps the batter stay smooth and not clump up when the melted butter is added.
The Magic of the Silky Glaze
A donut without glaze is just a round cake. The glaze is what makes it feel like a real treat from a shop. It adds a boost of sweetness and a beautiful shine. I love a glaze that is thick enough to stay on the donut but soft enough to bite through easily. This glaze uses powdered sugar, which is very fine and dissolves quickly. Regular sugar would stay crunchy, which is not what we want for a silky finish.
Making the glaze is very simple, but you have to watch the thickness. Sometimes it can be too thin, and you won’t see the color. Other times it can be too thick, and it will break the donut when you try to dip it. I will show you how to get that perfect balance. You can even change the flavor of the glaze if you want. You could use a little maple syrup or even some peppermint extract for a holiday twist. But for today, we are sticking to a classic vanilla and chocolate match.
Whisking the Glaze Together

In a clean bowl, mix 1 cup of powdered sugar with 2 tablespoons of cocoa powder. Adding cocoa to the glaze makes it a double chocolate donut! If you want a white glaze, just leave the cocoa out. Add 2 tablespoons of milk and a splash of vanilla. Use a fork or a small whisk to mix it. At first, it will look like it won’t come together, but keep stirring. The sugar will melt into the milk and suddenly turn into a thick, shiny liquid. It should look like melted chocolate but be much easier to pour.
If your glaze is too thick to stir, add more milk, but only a tiny bit at a time. I usually add it by the half-teaspoon. It is very easy to make it too runny! If it does get too thin, just add more powdered sugar. It is a back-and-forth game until you like how it looks. I like my glaze to fall off the spoon in a slow ribbon. This means it will coat the donut well without making a huge mess on the counter. FYI, the glaze will start to set and get a thin crust after a few minutes, so work quickly once you start dipping.
Dipping for the Perfect Finish

Once your donuts are totally cool, it is time for the dip. Take one donut and hold it by the sides. Lower the top half into the glaze bowl. Give it a little wiggle to make sure the whole top is covered. Lift it straight up and let the extra glaze drip back into the bowl for a second. Then, flip it over and place it back on the wire rack. The glaze will slowly spread out and become perfectly smooth. It looks like a mirror when it is fresh!
If you want to add sprinkles, you must do it right now. Once the glaze dries, the sprinkles will just fall off. I like to use colorful ones for a party or maybe some sea salt for a fancy taste. You can also drizzle a different color of icing over the top in lines. To do this, wait for the first glaze to dry for ten minutes, then use a spoon to zigzag a new color across. This makes them look like they came from a professional bakery. Your friends won’t believe you made them in your own kitchen!
Storing Your Tasty Treats

These donuts are best on the day you make them. Fresh donuts are the softest and have the best flavor. However, if you have extras, you can keep them for later. Put them in a container that closes tightly. They will stay good for about two days at room temperature. Don’t put them in the fridge because the cold air makes the bread part go stale and hard very fast. If it is very hot in your house, the glaze might get a little sticky, but they will still taste delicious.
I have tried freezing them before, and it actually works! If you want to save them for a long time, put them in a freezer bag. When you want one, just let it sit on the counter for an hour to thaw out. It won’t be quite as perfect as a fresh one, but it is a great snack to have ready. Just a warning: these donuts usually disappear very fast. In my house, they don’t even last until the evening! Make sure you grab one for yourself before you tell everyone they are ready.
Your Creative Donut Questions Answered
Can I make these donuts gluten-free?
Yes! You can use a 1-to-1 gluten-free flour mix. The texture might be a little more crumbly, but the chocolate flavor will still be great.
What if I don’t have a donut pan?
You can use a muffin tin! Just fill the holes halfway. They will be “donut muffins.” They taste exactly the same and are just as fun to eat.
Why is my glaze transparent and thin?
You probably added too much milk. Add more powdered sugar one tablespoon at a time until the glaze is thick enough to coat the back of a spoon.
Can I use water instead of milk for the glaze?
You can use water, but milk makes the glaze creamier and more white or opaque. Water will make the glaze a bit more like a clear syrup.
How do I keep my donuts from being dry?
Do not over-bake them! Check them at 8 minutes. If they spring back when touched, take them out. Also, make sure you don’t use too much flour when measuring.
Enjoy Your Homemade Bakery
Baking chocolate donuts at home is a wonderful way to spend time and make something special. You now know how to mix a soft batter, use a piping bag, and create a shiny glaze that looks professional. Remember to stay patient while they cool and have fun with your toppings. These treats are perfect for sharing with people you love. Go grab your apron and start baking your own rich, silky donuts today!